Amplenote supports two types of recurrence that we label as "fixed" and "flexible" recurrence. The former is the more conventional model of recurrence, used for events like meetings that happen (or are skipped) at predictable intervals.
The second type of recurrence, what we call "flexible recurrence" but can be referred to as "relative recurrence," chooses the next start time (aka "due time") based on whenever the past task was completed. Flexible recurrence is ideally suited for tasks like "exercise" and "chores," where you need to avoid lapsing into a habit of skipping of your fixed recurrence task or event.
There are many ways to set up both types of tasks on Amplenote.
It's also possible to control the timing of when you should begin thinking about the task (think: weekday vs. weekend), prior to the time you hope to complete it. We'll cover all of these topics in the following sections.
linkFixed recurrence
Select an option from the menu. Example values.
Or, create a custom schedule. Type "every" + a number, day of the week, or time interval to see options. Head over to Calculations: dates, time and math#Date calculation: defining recurring rules to see more natural language examples.
It will look something like this:
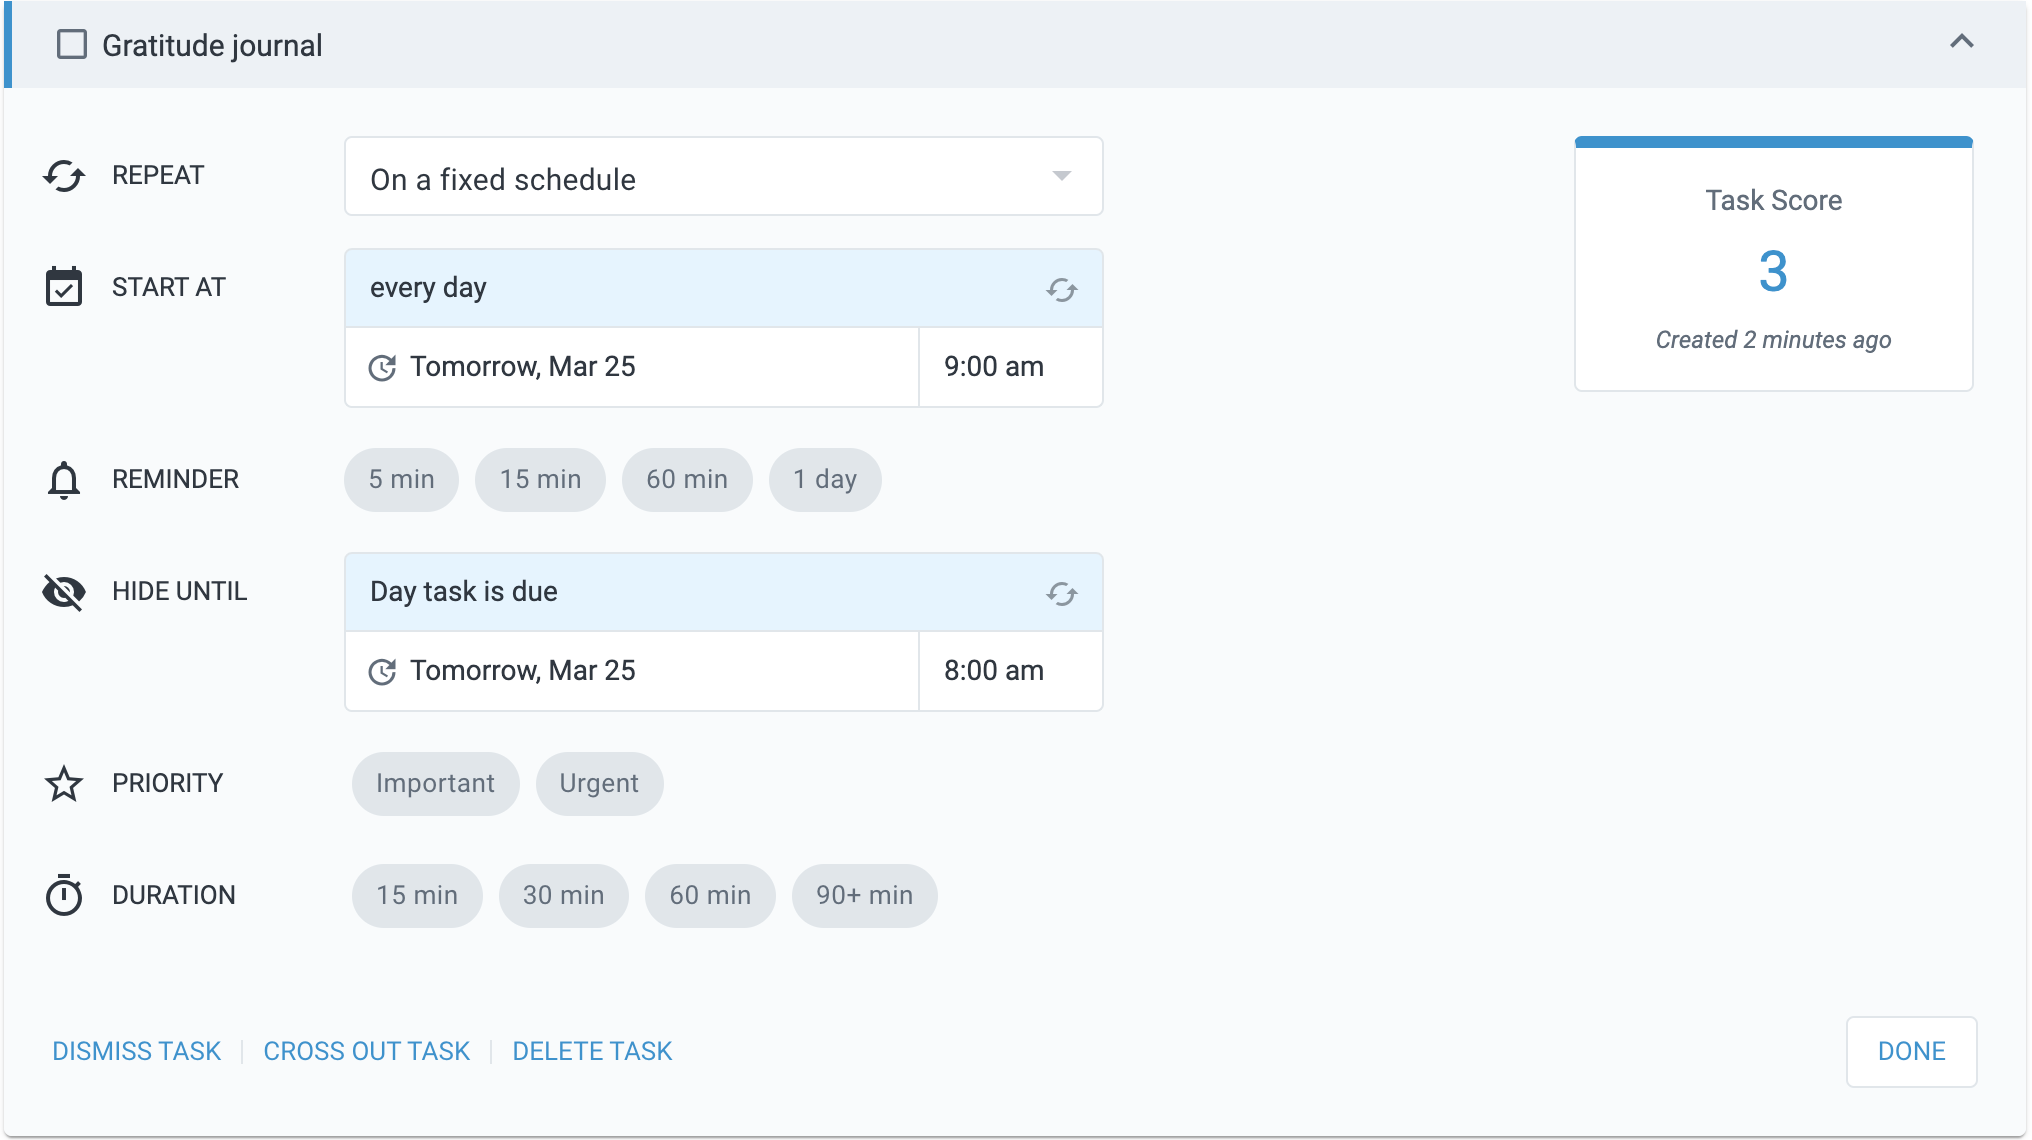
The time in the blue fields defines the rules for when this task will be due and when it is hidden. The times beneath the blue fields show when the next instance of the task will be triggered. You can click in the non-blue fields if you want to modify when the next instance of the task should occur, but you want to keep the rule for its recurrence unchanged.
link💫 Advanced weekly recurrence
Tasks can repeat on a weekly basis (such as every week on Monday), but you can also specify which days of the week the task should be due on: here is an example of a task repeating every weekday and an example of a task repeating on a custom week day pattern.
Head over to Calculations: dates, time and math#Date calculation: defining recurring rules for a longer list of natural language examples.
linkFlexible ("relative") recurrence
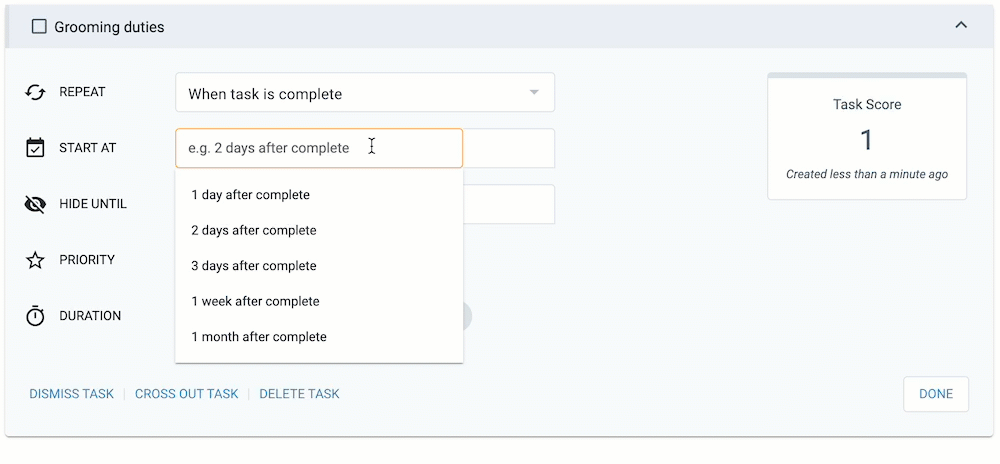
The most common way to set up a flexible recurring task is by opening Task Details, then:
Choose "When the task is complete" as the "Repeat" value
Enter your desired recurrence rule in the "Start at" menu. Example values.
(Optional) Select an option from the "Hide until" menu, so the task won't pop back on to your list immediately after you finish it. Example values.
As with the Fixed Recurrence mentioned above, blue fields defines the rules for the recurrence, and the non-blue fields show the specific time that the next instance of the task is upcoming.
Another way to set Flexible Recurrence is via the associated task command: Using the Keyboard-driven ! Task Commands Menu#Every.
linkLimiting recurrence to "weekdays" or "weekends"
Most types of tasks are either "Personal" or "Work" tasks, which usually means that they recur on either "only weekdays" or "only weekends."
In Amplenote, this is possible by using the slash commands /weekday or /weekend within a fixed or flexible recurring task.
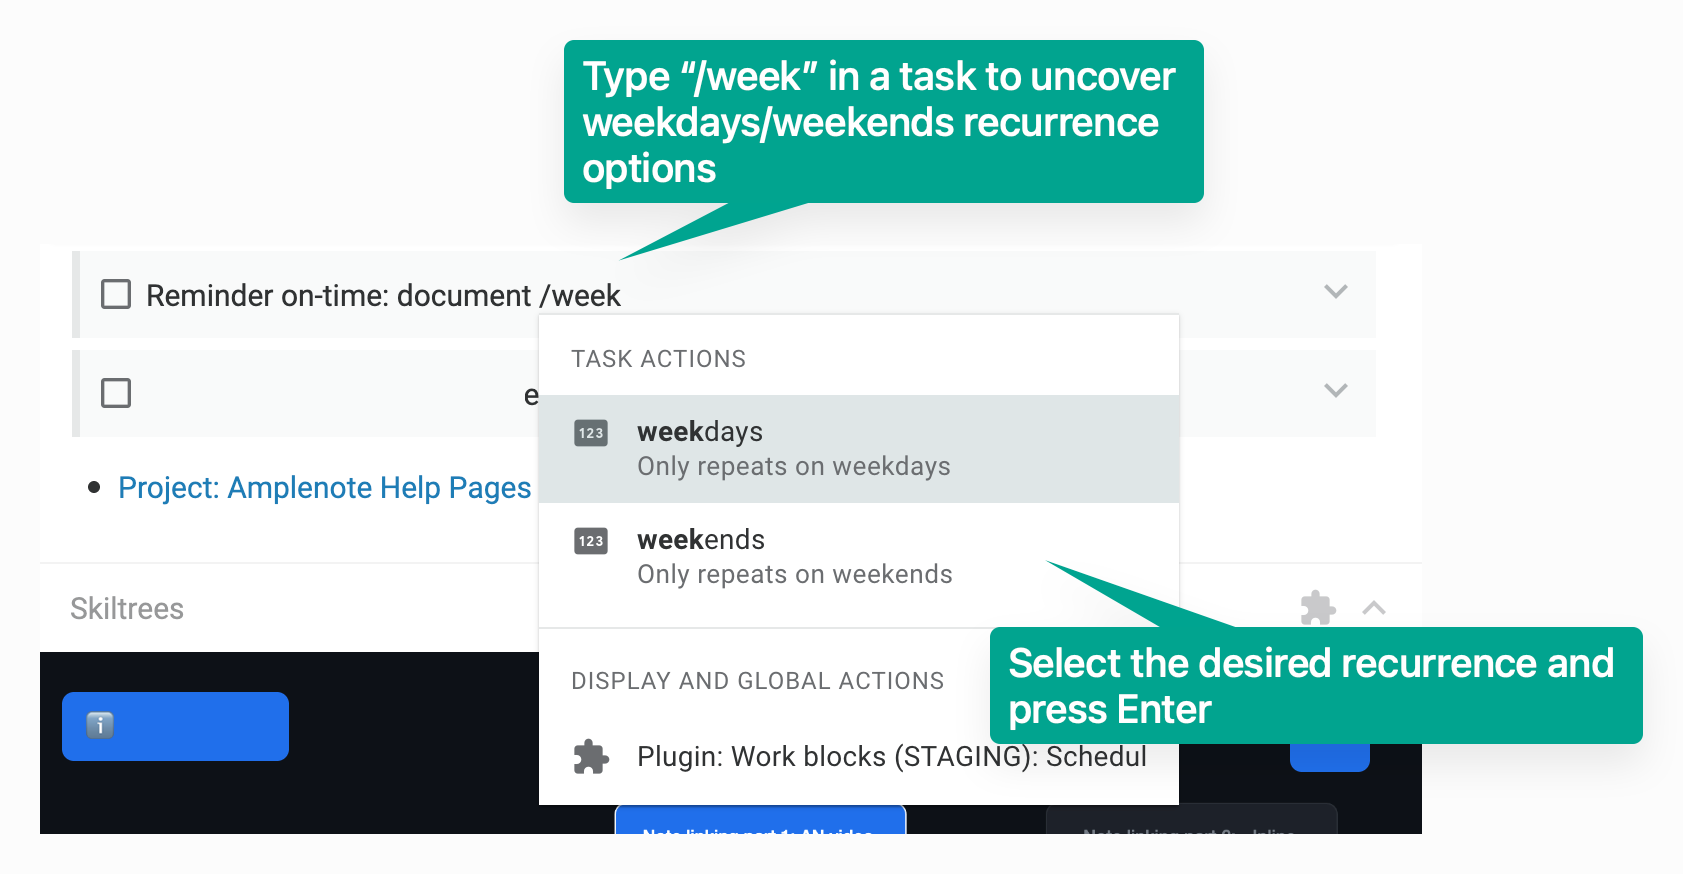
When selecting weekdays, the task will reoccur every Monday, Tuesday, Wednesday, Thursday and Friday, every week. When selecting weekends, the task wil reoccur every Saturday and Sunday instead.
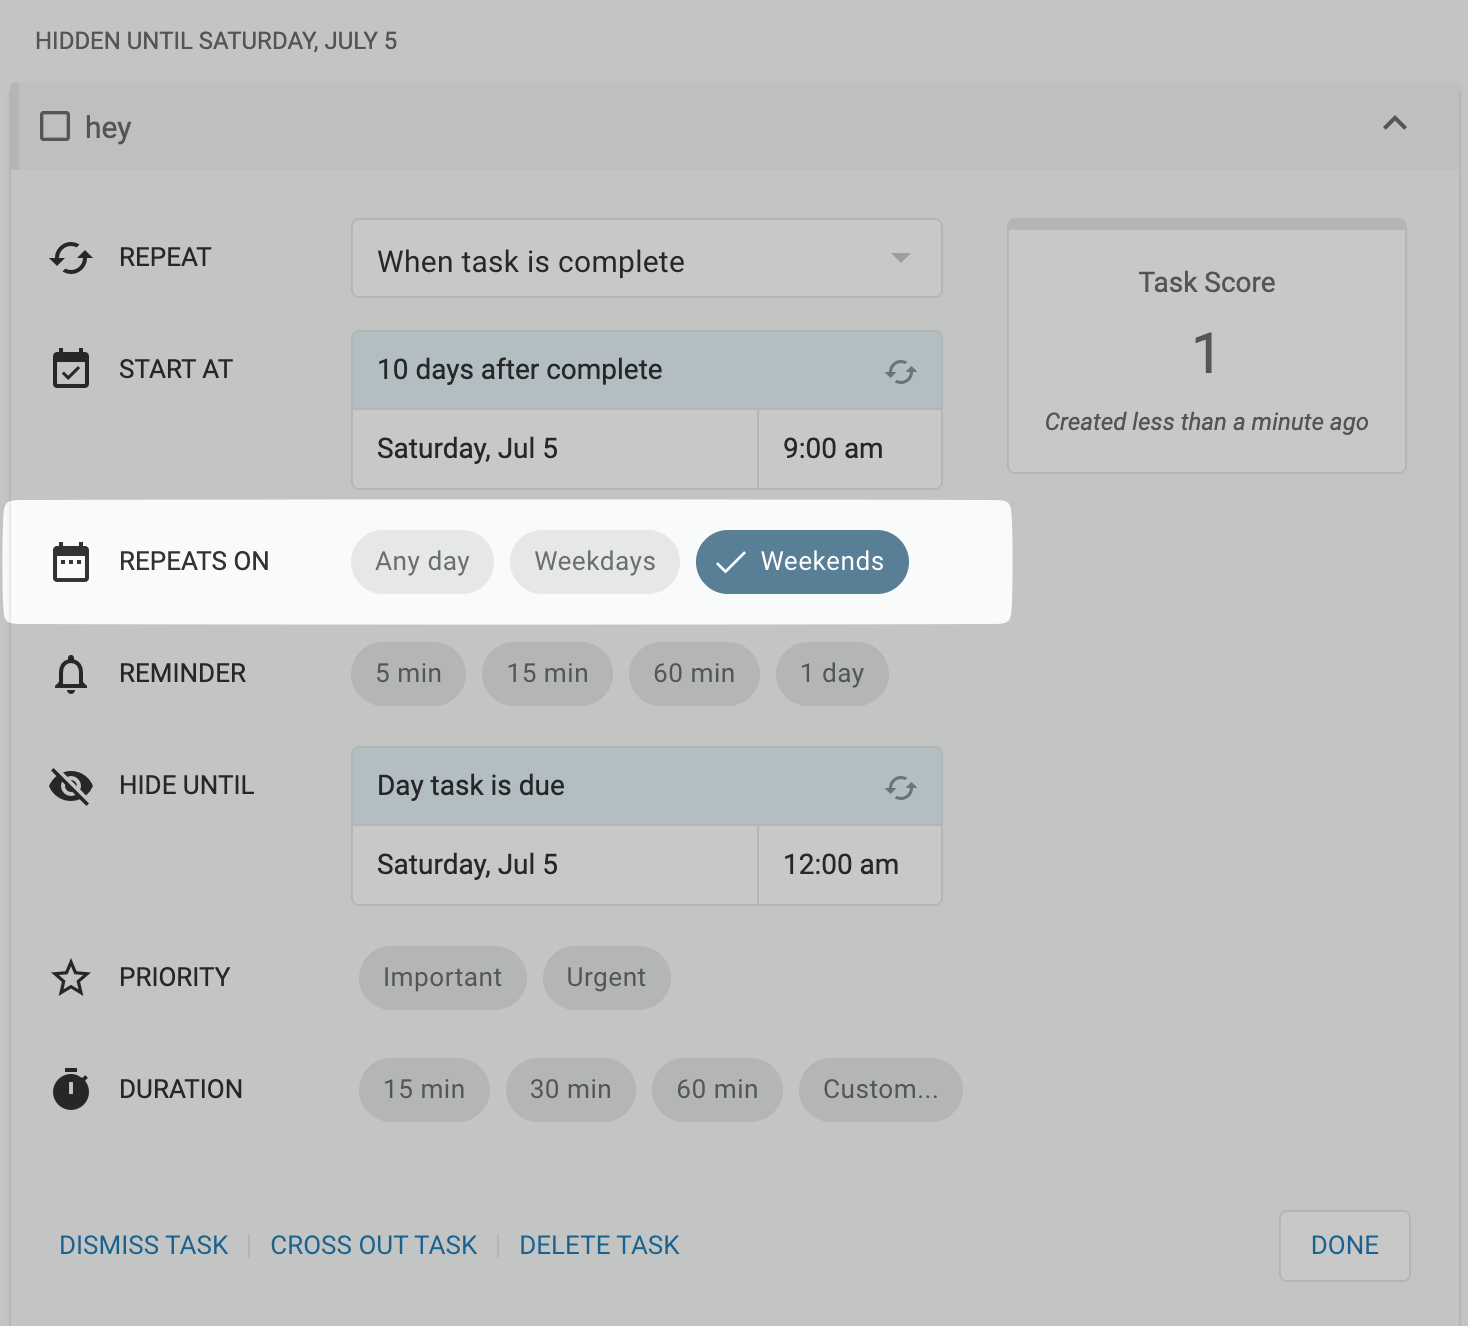
Once a task has been configured as "weekday" or "weekend" recurrence, it is also possible to control the recurrence time by opening the Task Details:
A flexible task limited to weekends will reoccur on the next Saturday if its next occurence falls on a weekday
A flexible task limited to weekdays will reoccur on the next Monday if its next occurrence falls on a weekend
linkLimiting recurrence instances
Sometimes you want to limit how many times a task or event will be scheduled to occur.
The key to limiting the length of the recurrence lies in working with the "Start At" input box, such that the recurrence rule that is saved has an endpoint. For example:
every day until December 31, 2023 or
every day for 16 times
The until and for keywords after an interval will be recognized as indicators for when a task should stop repeating.
When using until, you have to follow it up with a date. When completing such a repeating task, a repeat task will be generated if and only if its Start Date will not be after the specified limit date.
When using for, you need to specify the exact number of times that the task will reoccur for. No further tasks will be generated after that many repetitions have been registered.
By mid-2025, we expect to have additional avenues to limit recurrence. If you toss support for it on the Supporter Voting board, you can accelerate its delivery.
Testing