linkIntroduction
Once Amplecap has been installed in your browser, you can open or close it using Ctrl-Shift-A any time your browser is focused.
P.S. - This might be different or need changes if you use Firefox or already have an extension with this shortcut
Want to customize the hotkey that's used to bring up Amplecap? Check out Getting started with Amplecap#🔧 Customize default Amplecap shortcuts.
Interested in some quick tips and tricks instead? Head over to Cool ways in which we are using Amplecap (Getting started with Amplecap).
link📦 Where can I get it?
Download from the Google Chrome Store
Download from the Firefox Browse Add-Ons
linkHow can I get it to show as an icon in my browser?
By default, when you install a new extension in Chrome or Brave, it is activated in the browser but it doesn't show as an icon in the top browser bar, so it's difficult to actually activate the extension. To tell Chrome/Brave you want to see Amplecap in the top bar, try this:

You can do the same on Firefox, but you will need to click on the engine icon and choose the "pin to toolbar" option instead.
link⚡️ Capture a quick bookmark in one step
Use the quick-bookmark keyboard shortcut (by default Ctrl-Shift-E) to capture the current page as a task inside a predefined note. The first time you use this hotkey you can choose the note to send pages to. But you can also change this note at any time by visiting the extension settings page.
link🥅 Capture content in 3 steps
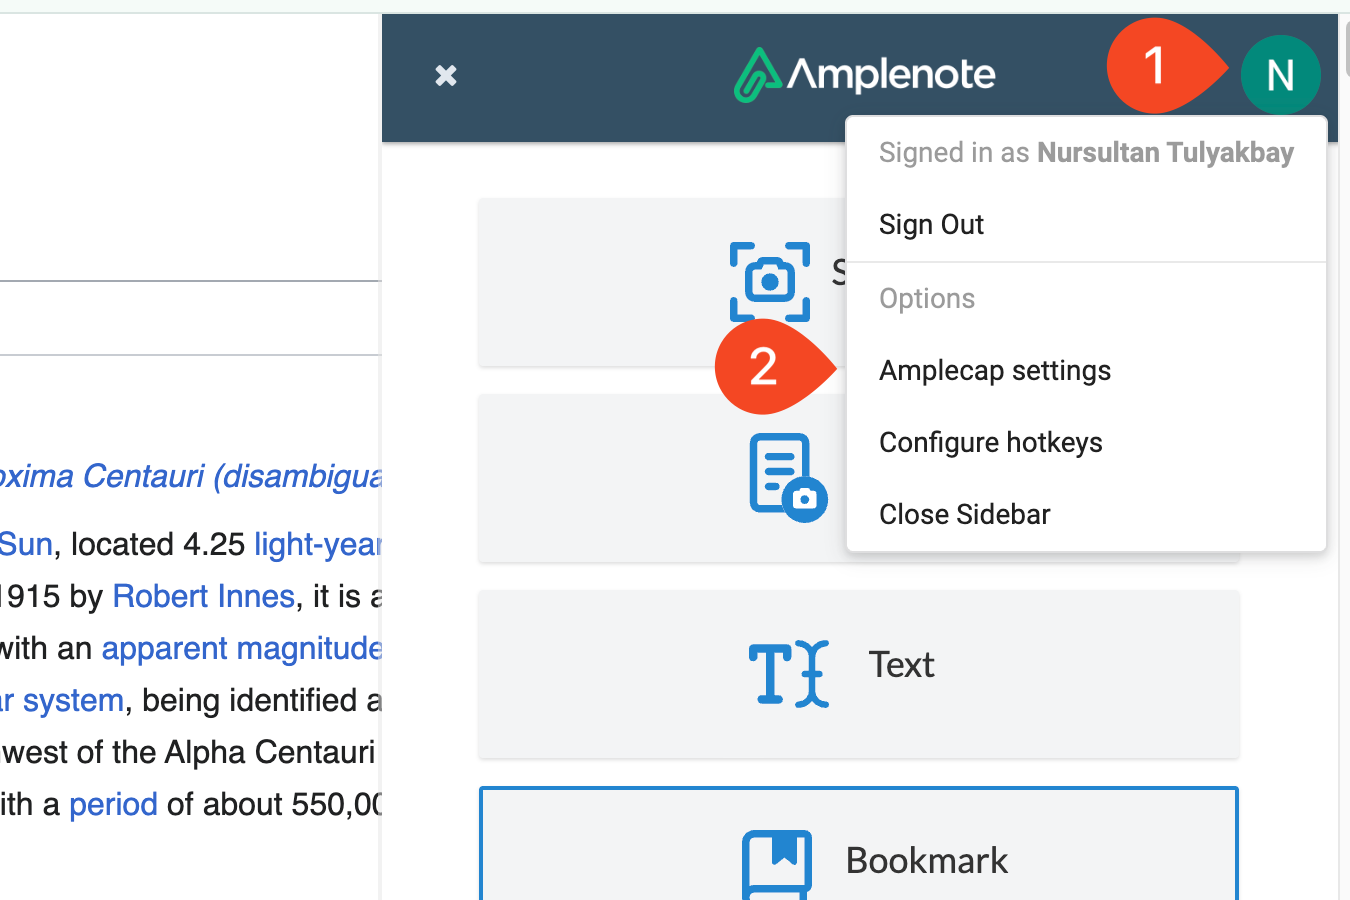
linkStep #1: Choose the capture type
The first choice you make when you use Amplecap is the kind of content you want to capture. In that regard, you can choose between 4 different capture modes:

Read more about Amplecap capture modes.
💡 To make capturing as effortless as possible, make sure to use the Up and Down arrow keys to switch between the available options.
linkStep #1.2: Choose how to send your content to Amplenote
On the same page you can also choose whether the content that you're about to capture should be sent to one of your notes or whether you want to paste it yourself inside Amplenote manually.

If you choose "Copy to clipboard", the content that you capture will be sent to the Amplenote clipboard buffer.
When choosing this option, you will be skipping Step #3: Choose the destination ✨;
Next time you open Amplenote you can insert the content by using the paste function.
When copying to clipboard, you can make another choice:

If you leave this option unchecked, the content will be pasted directly inside the note body;
If you check this option, the content will be added to a Rich Footnote first.
If you choose "Send to Amplenote", Amplecap will present you with Step #3: Choose the destination.
💡 Use the Left and Right arrow keys to switch between the two options.
linkStep #1.3: Choose the annotation text

The text you enter in this field will be added to Amplenote instead of the default annotation text - which is the page title.
linkStep #2: Select the content to be captured
This step looks differently depending on the capture type you picked at Step #1: What to capture?:
If you selected "Full page" or "Bookmark", you don't have to do anything here ✨;
If you selected "Screenshot Selection", or "Highlights" you have to choose the respective content from the web page.
linkStep #3: Choose the destination
The third Amplecap screen is displayed only if you chose "Send to Amplenote" back at Choose how to send your content to Amplenote.

You have two choices:
"New note" will create a brand new note with the content you've just captured;
When choosing this variant, you can optionally change the title of the note as well as assign tags to it.
"Choose note" lets you search for an existing note;
Amplecap will insert the captured content at the beginning of the note.
linkStep #3.2: The 3 content formatting options

Note body. The most luxurious landing pad for your newly captured content. When Note body is selected, we'll put your captured content straight into a new note, or insert it at the beginning of an existing note.
To-do item. If you want to remember to follow up on this captured content later, capturing it into a To-do item makes that easy.
Bullet point. For the various lists you are maintaining across your notebase, choosing the "Bullet point" option puts your captured content into a Rich Footnote that fits into a bullet.
💁♀️ Some rules that apply to content captured into to-do and bullet items:
To-do's and bullets are added to the beginning of existing notes;
Content is added inside a Rich Footnote, using the value from the Choose the annotation text as text for that Rich Footnote.
Read further to understand more about all of the buttons and knobs work, or jump to 🤓 Amplecap keyboard shortcuts or head over to Cool ways in which we are using Amplecap (Getting started with Amplecap).
linkAmplecap capture modes
linkScreenshot selection
Use the mouse to drag over the part of the page you want to capture by drawing and adjusting a rectangle selection. When clicking the Save selection button, a screenshot of your selection will be saved to your note.
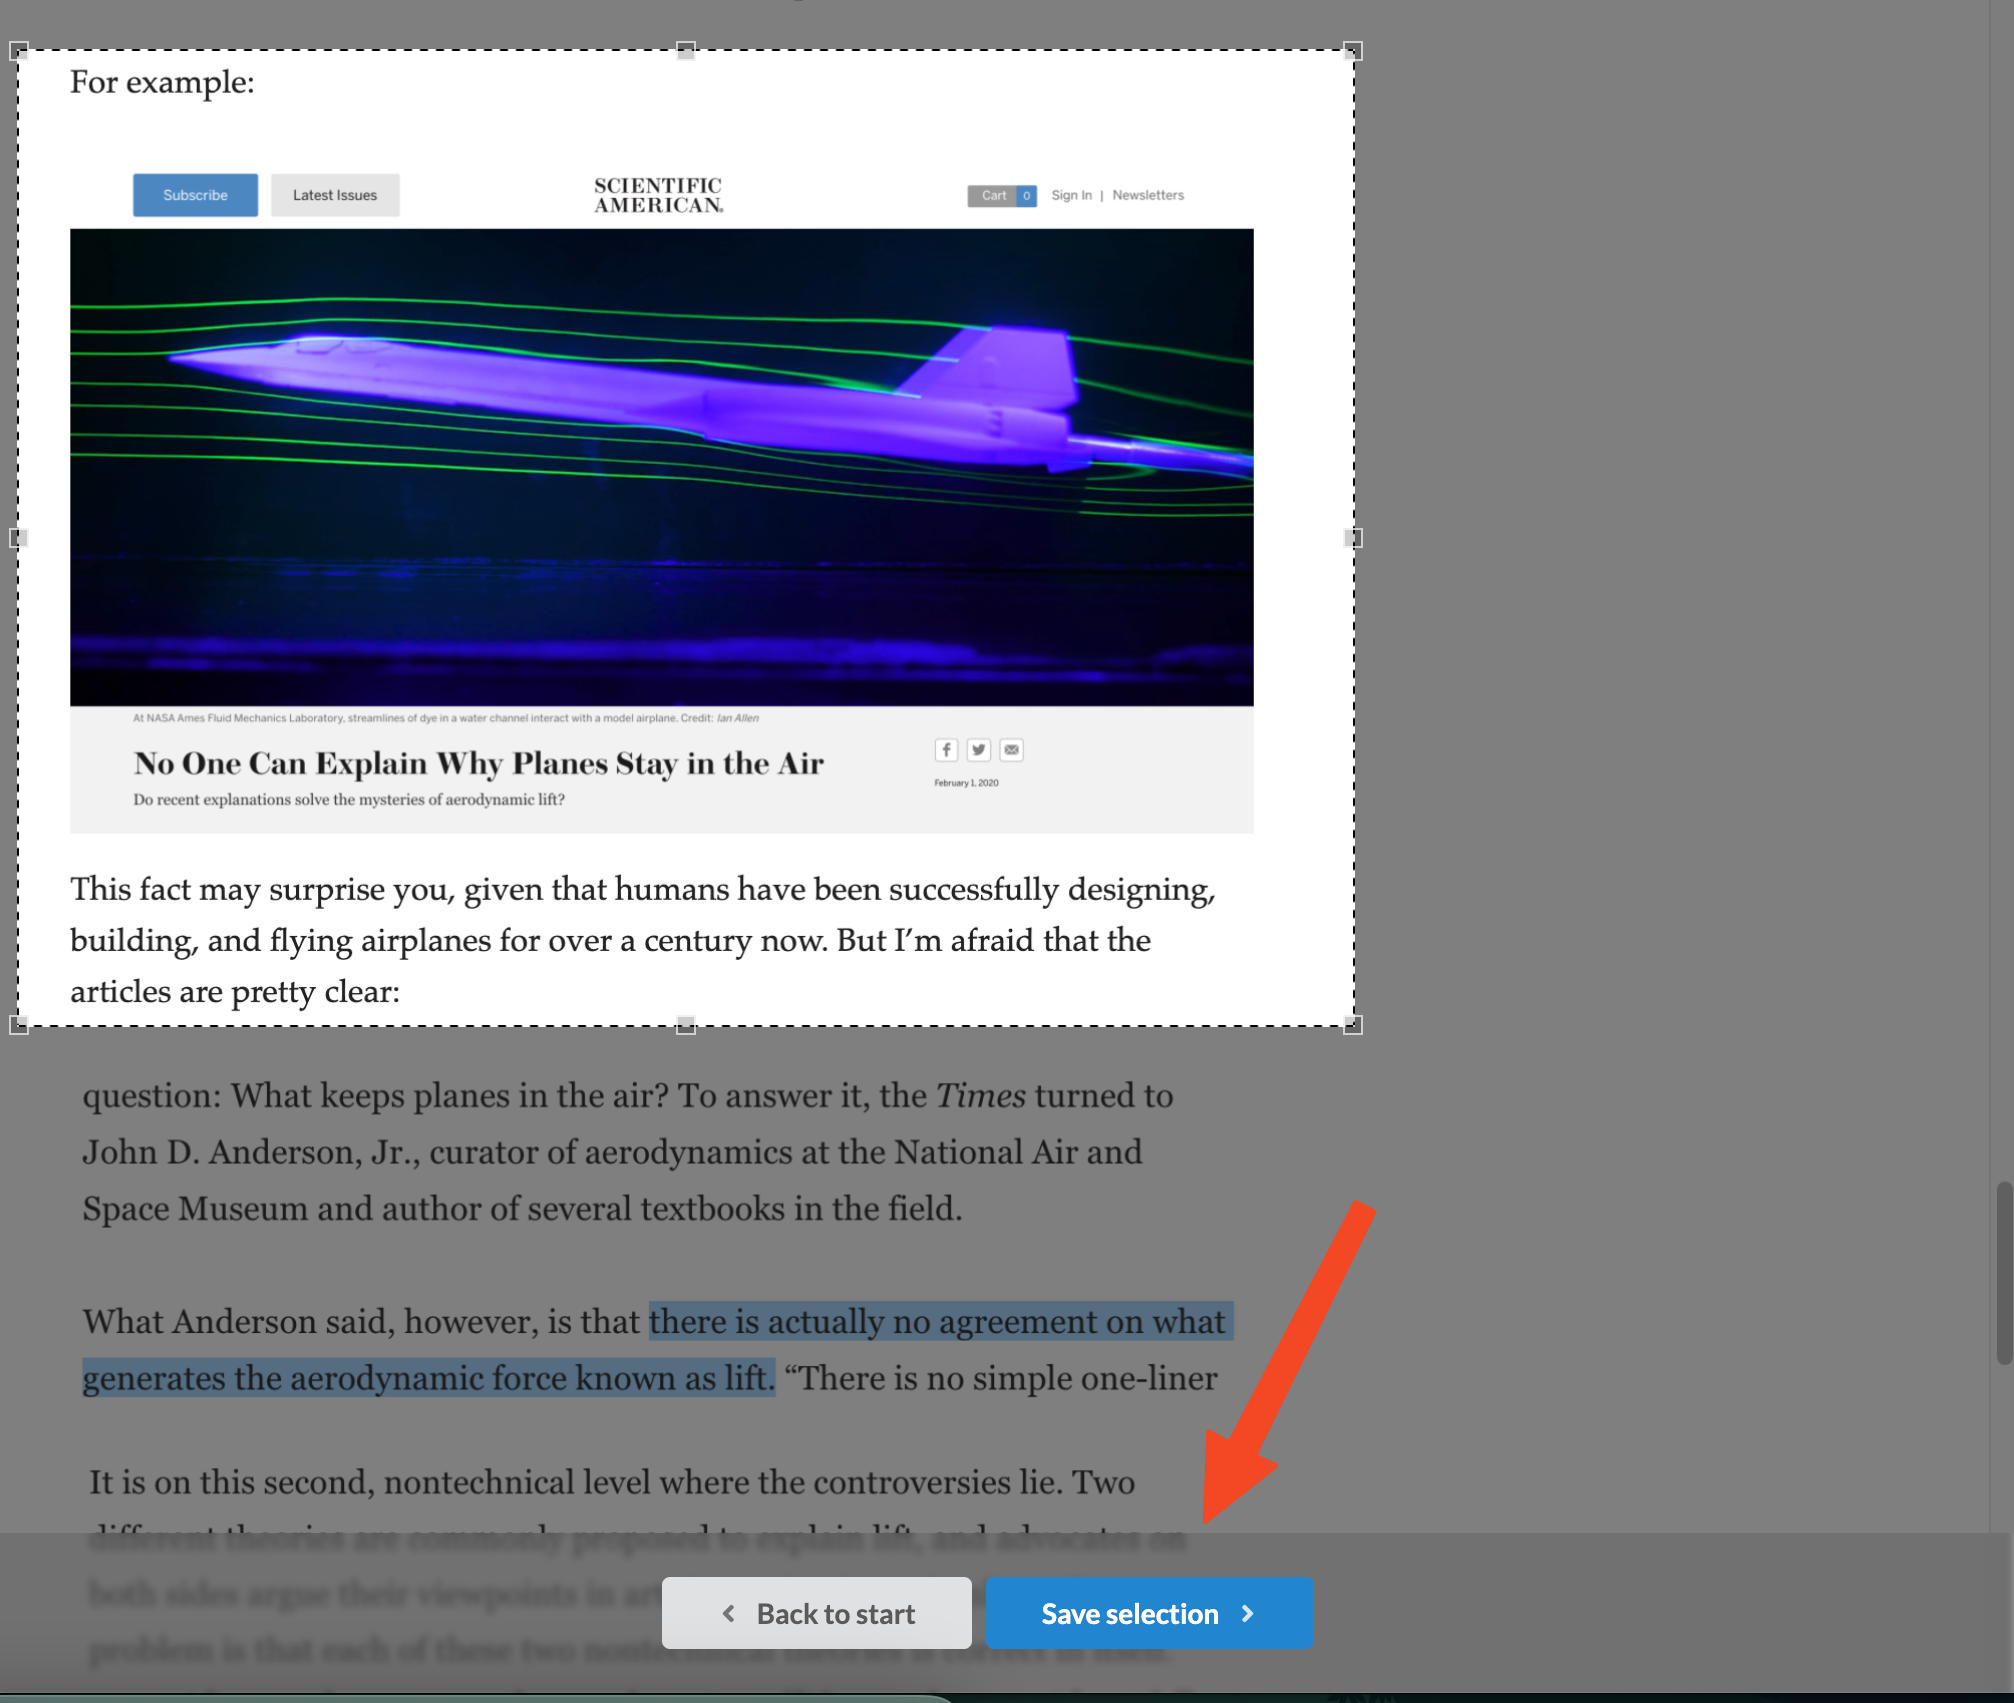
All images uploaded to your notes are processed by the OCR engine, which means that any text found inside your screenshots can be found via the search bar in Amplenote and it can be extracted to your note.
Check out some examples of using this capture mode over at Getting started with Amplecap.
linkHighlights
Manually select multiple phrases from a web page and save them to a note in one click.
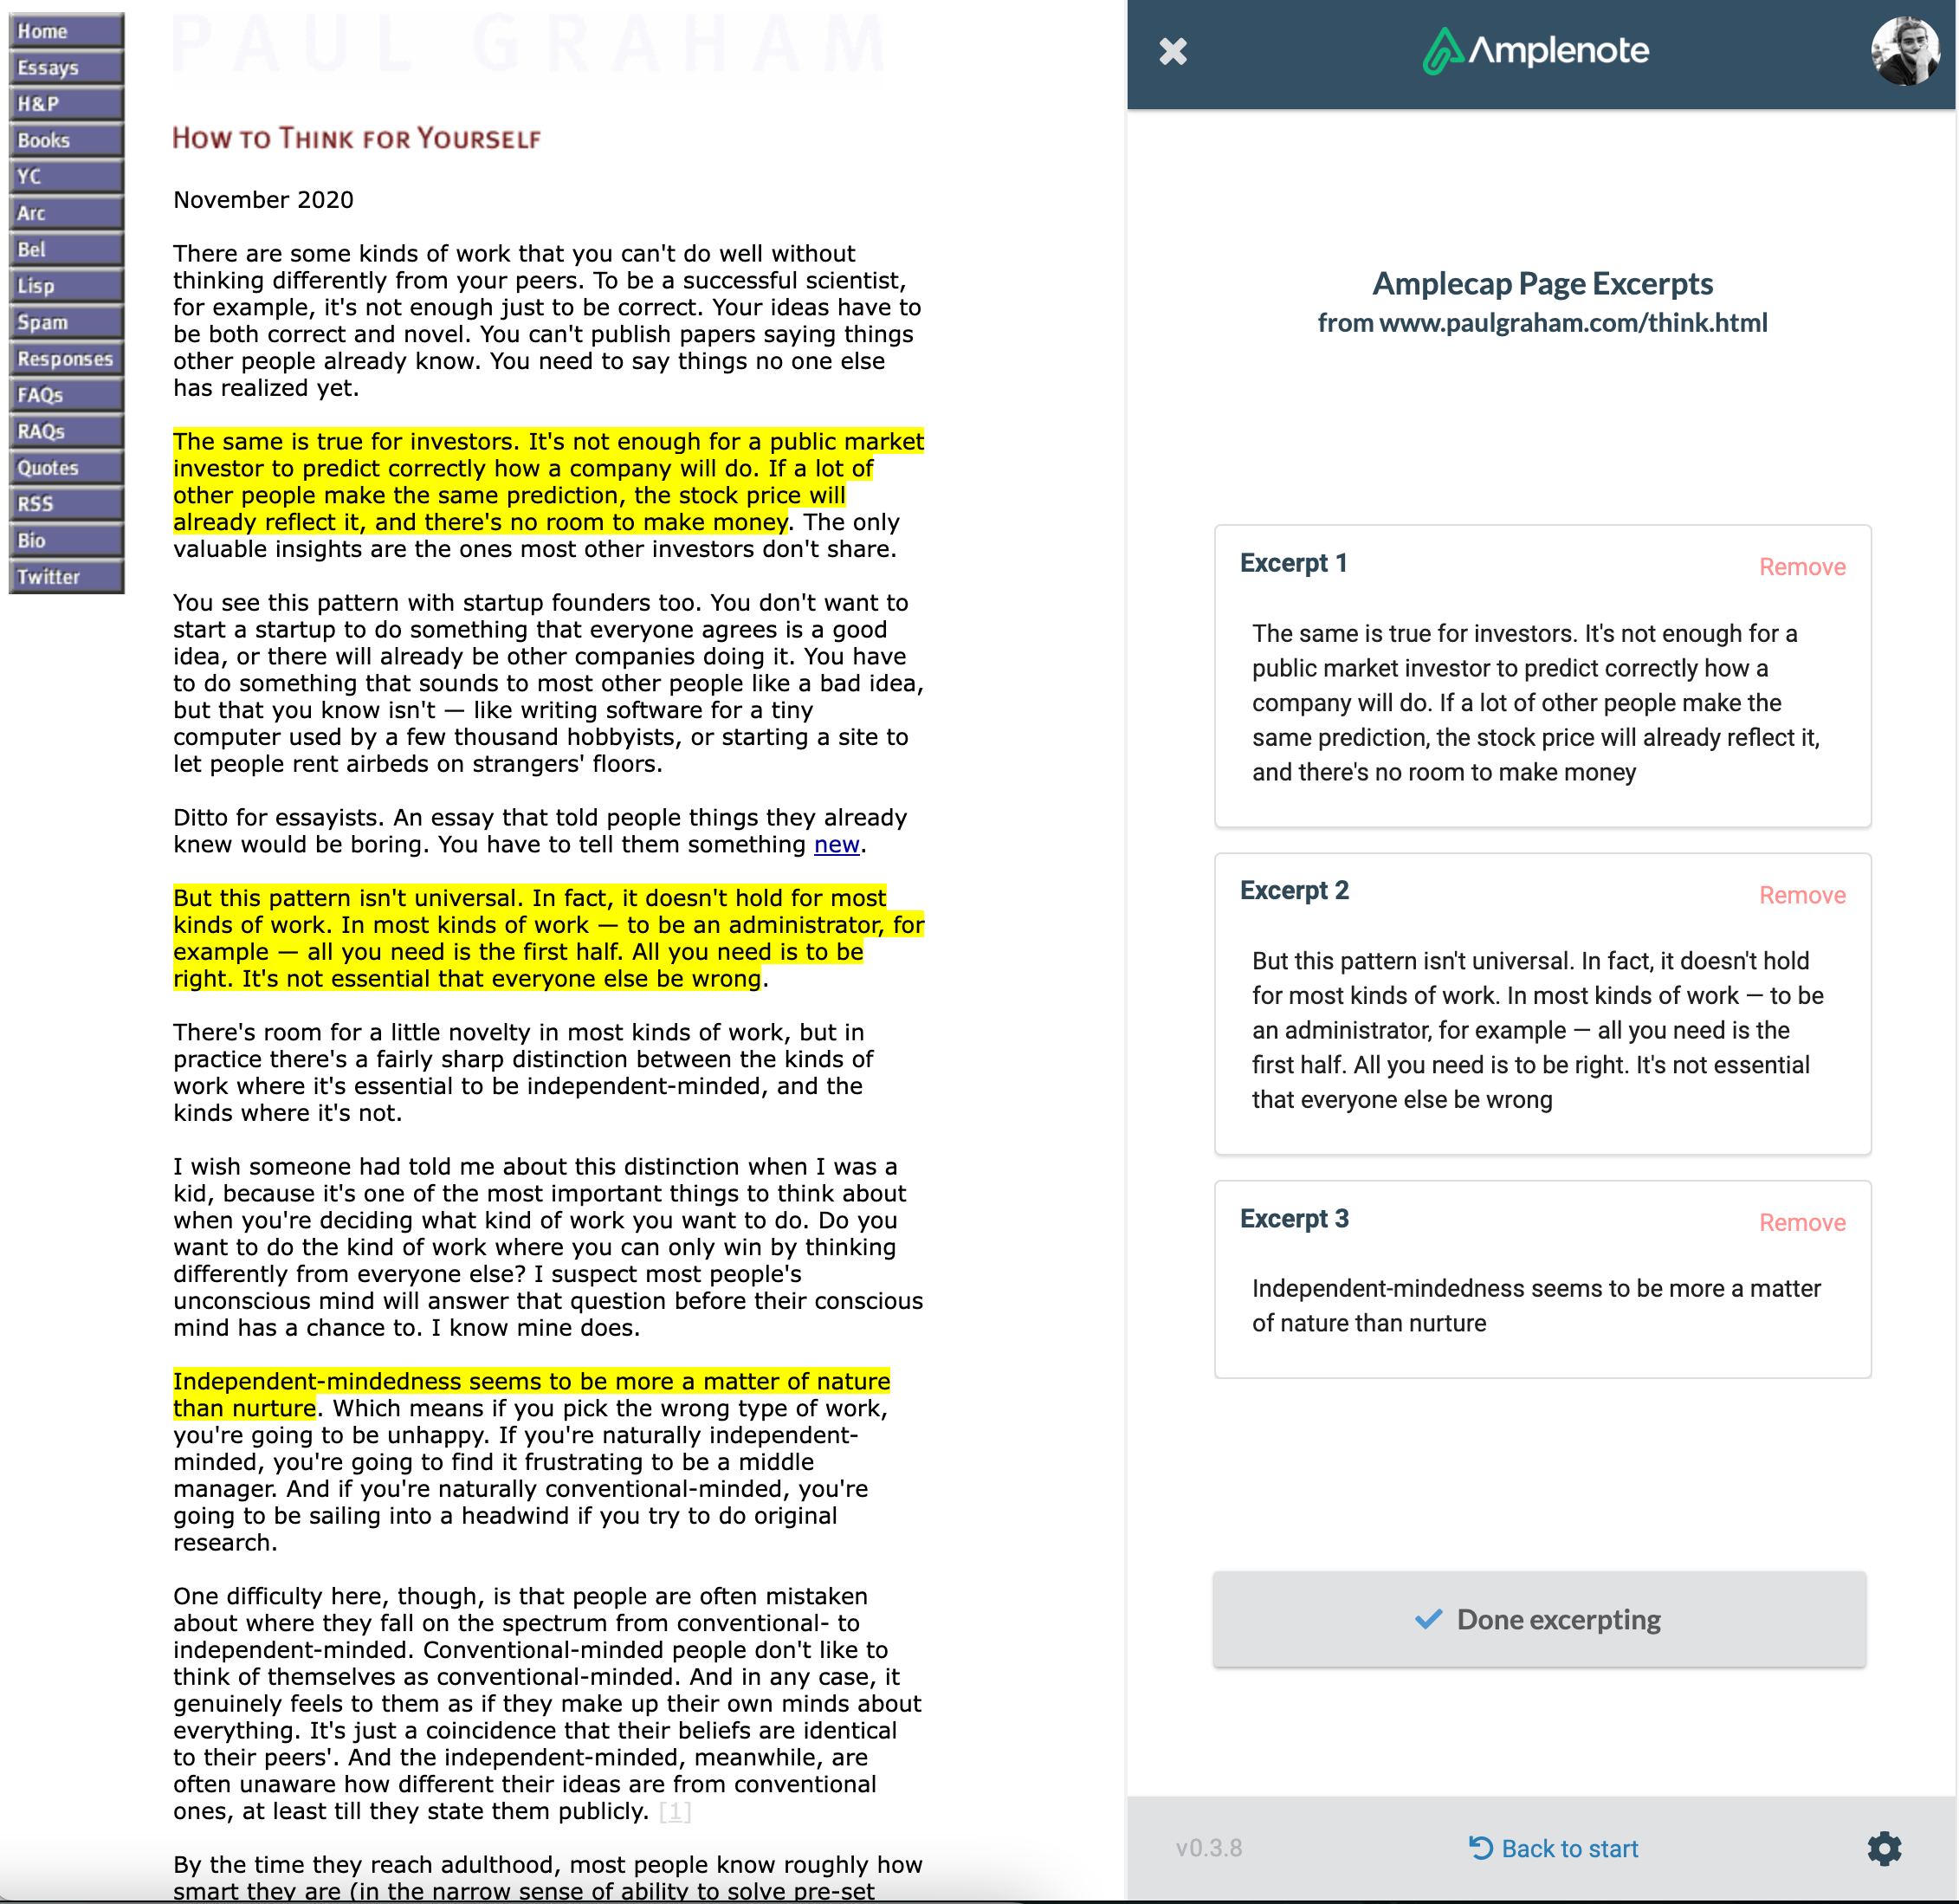
Individual excerpts are editable, so you can add additional text to any item before capturing them to your Amplenote. Head over to Getting started with Amplecap for some usage examples.
Depending on how you choose to format the captured paragraphs in the destination note, your excerpts will look differently:
If you capture them to a note body, then the entire set of excerpts is inserted into the note as a quoted block:
If you capture your excerpts into a bullet or a task, the excerpts are stored in a Rich Footnote: Excerpts from How People Get Rich Now added 06/13/21 at 6:05pm
linkFull page
Save a screenshot of an entire web page to one of your notes; here is an example of a full page captured into the clipboard: Seven of our Favorite Amplenote Shortcuts - Amplenote
linkBookmark
Save the URL of the page you are visiting to your notebook. For some cool use-case, check out Cool ways in which we are using Amplecap (Getting started with Amplecap)#☑️ Saving web pages to your reading list.
linkImporting Amplenote templates
Amplecap can be invoked when visiting notes published by Amplenote users. On public.amplenote.com/* URLs, Amplecap will let you duplicate a note with one click:
When clicking on "Duplicate Note", Amplenote will create a copy of the note you are visiting in your notebook.

Duplicating public notes is the quickest way to import a template into your own notebook.
linkOmnicapture
In Chrome browsers, Omnicapture allows you to quickly create notes and send them to Amplenote. As long as your browser is open, you can invoke this mode from any context. This makes it the fastest way to add tasks to Amplenote ⚡.
In order to enable Omnicapture, you need to add a global shortcut in your Chrome settings: Getting started with Amplecap#🔧 Customize default Amplecap shortcuts.
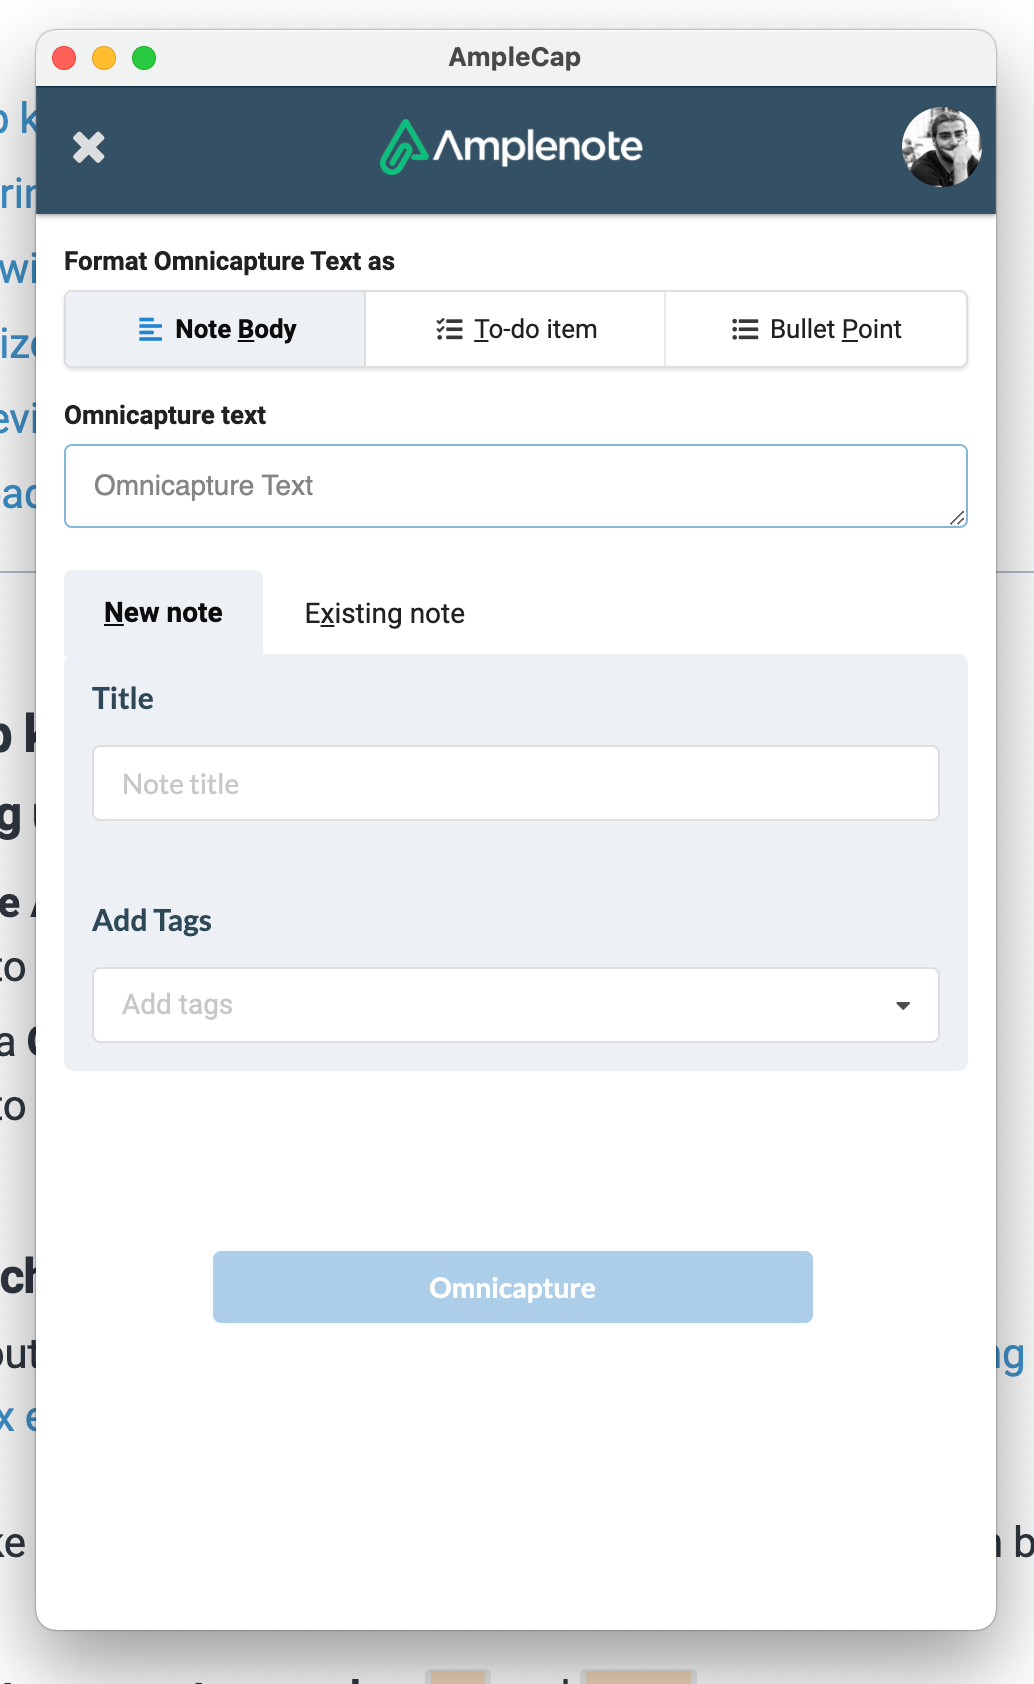
When using Omnicapture, you have the following options:
Change the formatting of the capture content; check out Step #3.2: The 3 content formatting options;
Change the destination of the content; check out Step #3: Choose the destination.
Note that this mode is the only one that does not capture information from a webpage. Find some examples with screenshots over at Getting started with Amplecap