Tasks are first-class citizens in Amplenote. All tasks reside within a note, but it's easy to view tasks apart from their note-bound context. In this help article, we'll cover how to create tasks, and what options Amplenote provides for configuring them.
linkOn YouTube
Get some inspiration for your task management system from this video:
Get an intro to Task Score and Tasks Mode:
Learn about dismissing and completing tasks:
Learn how to add more details to your tasks:
linkDifferent ways to add new tasks
There are many different paths by which tasks can enter your Amplenote world.
linkCreate tasks from within note or a jot
The "classic way" to create new tasks. To create a new task within an open note or jot you can either:
1. Type [] (that is, open bracket, closed bracket, space) in the note area, then type your task text. For example:
Creating a new task by typing brackets, followed by a space. Then check it to mark as complete

2. Click the check icon in the formatting bar
Tapping the checkbox icon will create a new task on either desktop or mobile

Either way you create a task, it will show up in Tasks View Mode and organizing task lists (to-do lists) in whatever tags you have assigned to your note or jot.
linkCreate a task from mobile Quick Task Bar
Check out the dedicated help page on this topic here: The iOS & Android Quick Task Bar: creating tasks and to-do lists on mobile.
linkCreate a task from the Quick Open menu
Check out the dedicated help page on this topic here: How do I use Quick Open navigation?#Quickly create new tasks.
linkCreate a task from email
Every note offers the provision to have an email address associated with it using our mail-to-note feature. By creating a contact in Gmail (or your email app of choice) with your note address, you can quickly forward emails to your todo list.
linkCreate a task from within a mobile app
There are a few mechanisms for capturing new tasks to Amplenote on mobile, as outlined below.
linkCreate a task from the home screen widgets
Check out the separate page we have on this topic: Widgets: an iOS and Android glimpse into your agenda & lists.
linkCreate a task from the Share Sheet
We also have a separate page on this topic: iOS/Android Share Sheet: Sending text, links, images and PDF files on mobile .
linkiOS Only: capture tasks with voice input via Siri Shortcuts
Check out the separate article on voice input: Recording voice notes, speech-to-text or audio notes
linkCreating a subtask
To create a subtask, use the tab key to indent, or shift-tab to outdent, child tasks. For example
🎁 Send Santa an updated present list
Grow 1" by tomorrow
Watch the paint dry
To learn more about using subtasks, check out Using nested tasks and subtasks.
linkCreate a task via system-wide hotkey
If you install the Amplecap browser extension (Chrome, Firefox), then you can define an Omnicapture hot key that will allow you to capture a task even when you're not using Amplenote. You can read more about Omnicapture on the help page for Amplecap.

In a 2024 update of the Amplenote native desktop app, we plan to introduce a configurable system-wide hotkey that can be used to capture a task or look up a note.
linkHow can I add images, text, and other details to a task?
Often, there are details about a task that go beyond words. For example, if you're keeping a list of glitches to fix, it's handy to be able to include an image of the problem with each task. The way to do this in Amplenote is through Rich Footnotes and content previews.
Rich Footnotes can be used to store any combination of
Check it out:
This task references an image, video, text , a link plus a combination thereof 😅
We are constantly adding new types of content that can be stored in Rich Footnotes, so visit Rich Footnotes and content previews to see the full list of content that can be embedded in a task.
linkHow do I create or update recurring tasks?
Learn all about recurring tasks on its dedicated help page.
linkHow do I use Task Details?
Use the expand icon on the right of the task bar to open the Task Details, or use the hotkey. This will make available the options listed below.

linkSet a "Start Time" (aka "Due Date")
We dedicated an entire page to describing how to set a Start Time/Due Date for your task.
linkSet a Reminder
In the Task Details panel, you can check if you want to receive a notification at the task's "Due" time. Notification options can be managed in Settings > Notifications. There you can configure yourself to receive push notifications, browser notifications, or email notifications.
linkIs it Urgent, Important, Both or Neither?
Based on the Eisenhower Method (aka the Covey Quadrants), lend your future self a hand by deciding whether the newly created task is Urgent, Important, both, or neither:
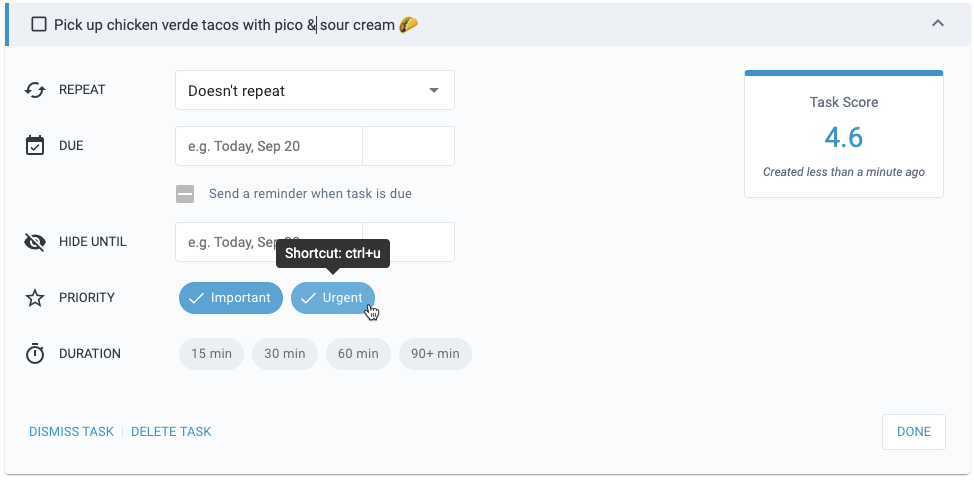
Here's how we think about the two:
Urgent tasks mean that some bad consequence will ensue if this doesn't get done in the next couple days. 😬
Important tasks mean that the task aligns with your existing long-term or short-term goals. 🌈
In general, we believe that a more successful and productive life results from minimizing time spent on Urgent tasks and maximizing time spent on Important ones.
Urgency and importance can also be set using the associated task commands: Using the Keyboard-driven ! Task Commands Menu#Important & Urgent.
linkSet the Duration
Duration allows you to specify how long you think a task will take.
Choose from the four options
Tip: if you have tasks that are 90+ minutes, it might help to break them down into a few smaller tasks
We find that tasks in the 15- and 30- minute range are often easier to take action on
Task Score is designed to prioritize shorter task
Shorter duration tasks accumulate Task Score more quickly because you once cared enough to pick a Duration for them, and they're easy opportunities to reduce the clutter on your todo list by completing them
Task duration can also be set using the associated task command: Using the Keyboard-driven ! Task Commands Menu#Duration.
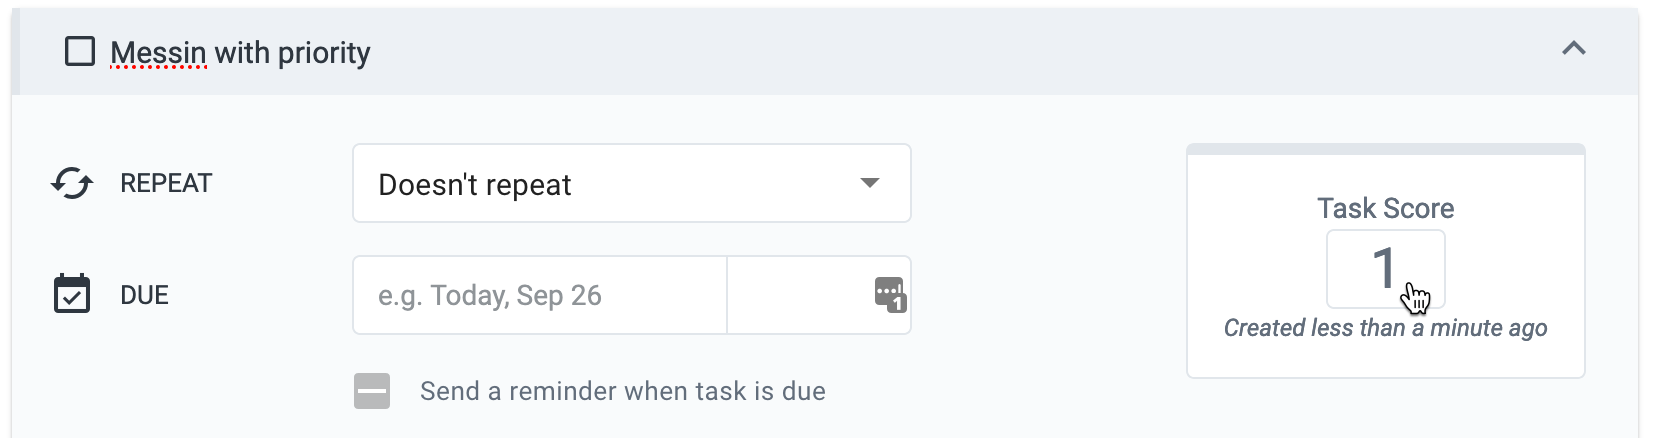
linkEdit the Task Score
Click the number in the Task Score area, then enter a new score:
Other ways to edit task score include:
Resetting the score of a task: Using the Keyboard-driven ! Task Commands Menu#Reset Score;
Increasing the score of a task: Using the Keyboard-driven ! Task Commands Menu#Max Score;
Batch-editing the score of a task: Batch change Task Scores in a note.
linkThe "Manage tasks" panel
This is a per-note option that lets you achieve pretty unique and useful things:
Review stats on the open tasks in the current note
linkMany options to hide (snooze) a task until later
There are many ways to hide a task until later. Snoozing tasks is such an essential piece of the Amplenote experience that it earns its own first class-help page here.
linkMaking tasks go away 🗑️
link✅ Completing tasks
To mark a task as complete, you have three options:
Click into the checkbox to check it off your list;
Use the associated keyboard shortcut: Keyboard Shortcuts & Markdown Syntax Examples#Mark task complete;
Use the associated task command: Using the Keyboard-driven ! Task Commands Menu#Complete.
Once marked as complete, your task will be moved to the bottom of your note, in the Completed tab, where you can also see the todo graph displaying your productivity score.
Want your tasks to stay inline? Check out ☑️ Crossing out tasks.
link⏳ Rewriting history by moving completed tasks
In the
Completedtab of a note, use drag-and-drop to move a task's completion date to another day.
link✏️ Dismissing tasks
In addition to marking them as complete, tasks can also be dismissed for half the accumulated score (read more about How does Task Score work?).
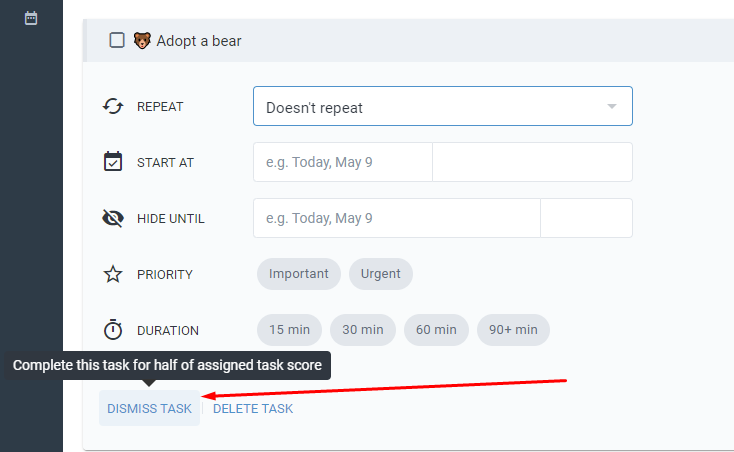
You might consider dismissing a task when it's half done, somebody else happened to get to it before you did or circumstances made it so that the task was no longer necessary. Whichever convention you choose, task dismissal is a good way to procrastinate on your to-do's while also getting rewarded some of the sweet task score for it.
Note that dismissing a recurring task will keep the upcoming occurrence of that task!
Also check out the associated keyboard shortcut: Keyboard Shortcuts & Markdown Syntax Examples#Dismiss task.
link☑️ Crossing out tasks
For more, see our dedicated help page on crossing out (strikethrough) tasks when completed
link🗑️ Deleting Tasks
If you need to remove an item from your todo list altogether, click into the line and use the Delete or Backspace key on your keyboard to remove the task.
Alternatively, you can expand the task details and use the "Delete" option in the menu, or use the associated task command: Using the Keyboard-driven ! Task Commands Menu#Delete.