
linkWhat is the Graph View mode?
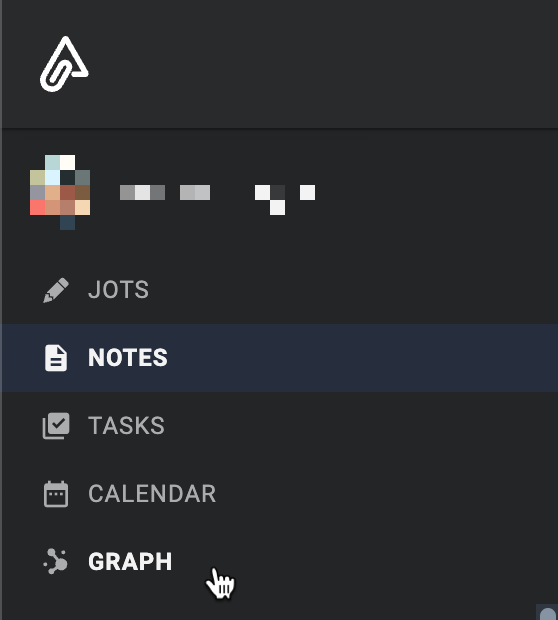
Graph View is the best way to browse through and organize your hundreds (or thousands) of notes -- visually. In order to view your personal web of wisdom, click the button labeled "Graph":
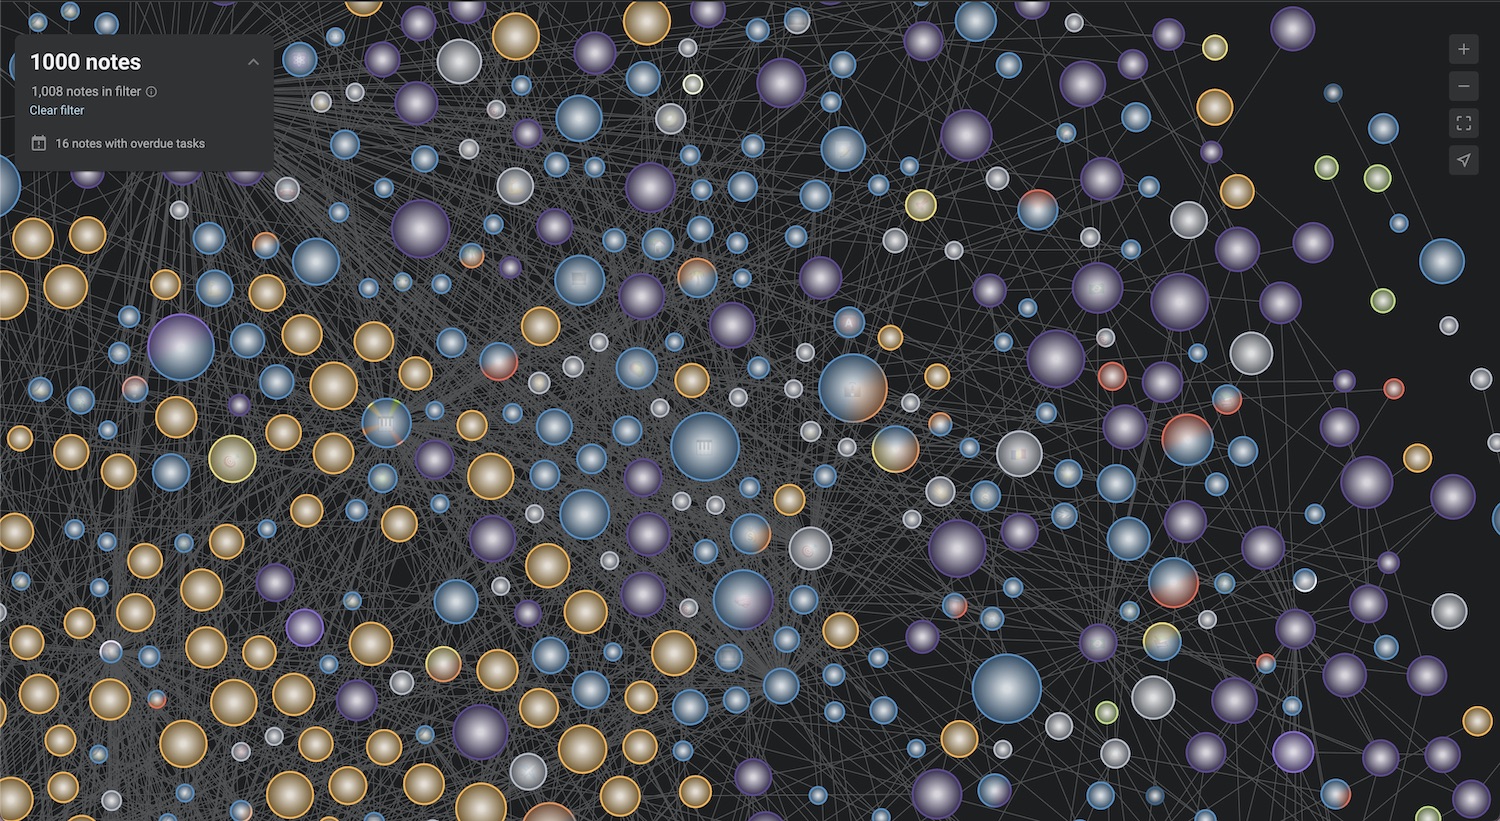
Whenever you're taking notes and deciding to create a link to another note, you are creating a connection. These connections have always been visible in the "Backlinks" tab of each note, but now you can also visualize them by visiting the new Graph View mode. ✨
Each circle (interchangeably referred to as "node" or "graph node") represents a note. The more content in your note, the bigger its circle. The color of each circle is determined by the tags that are applied to that note. If a note has multiple tags with different colors, its circle will show a gradient between those colors. 🎨
If you want to learn more about tag coloring, check out this page.
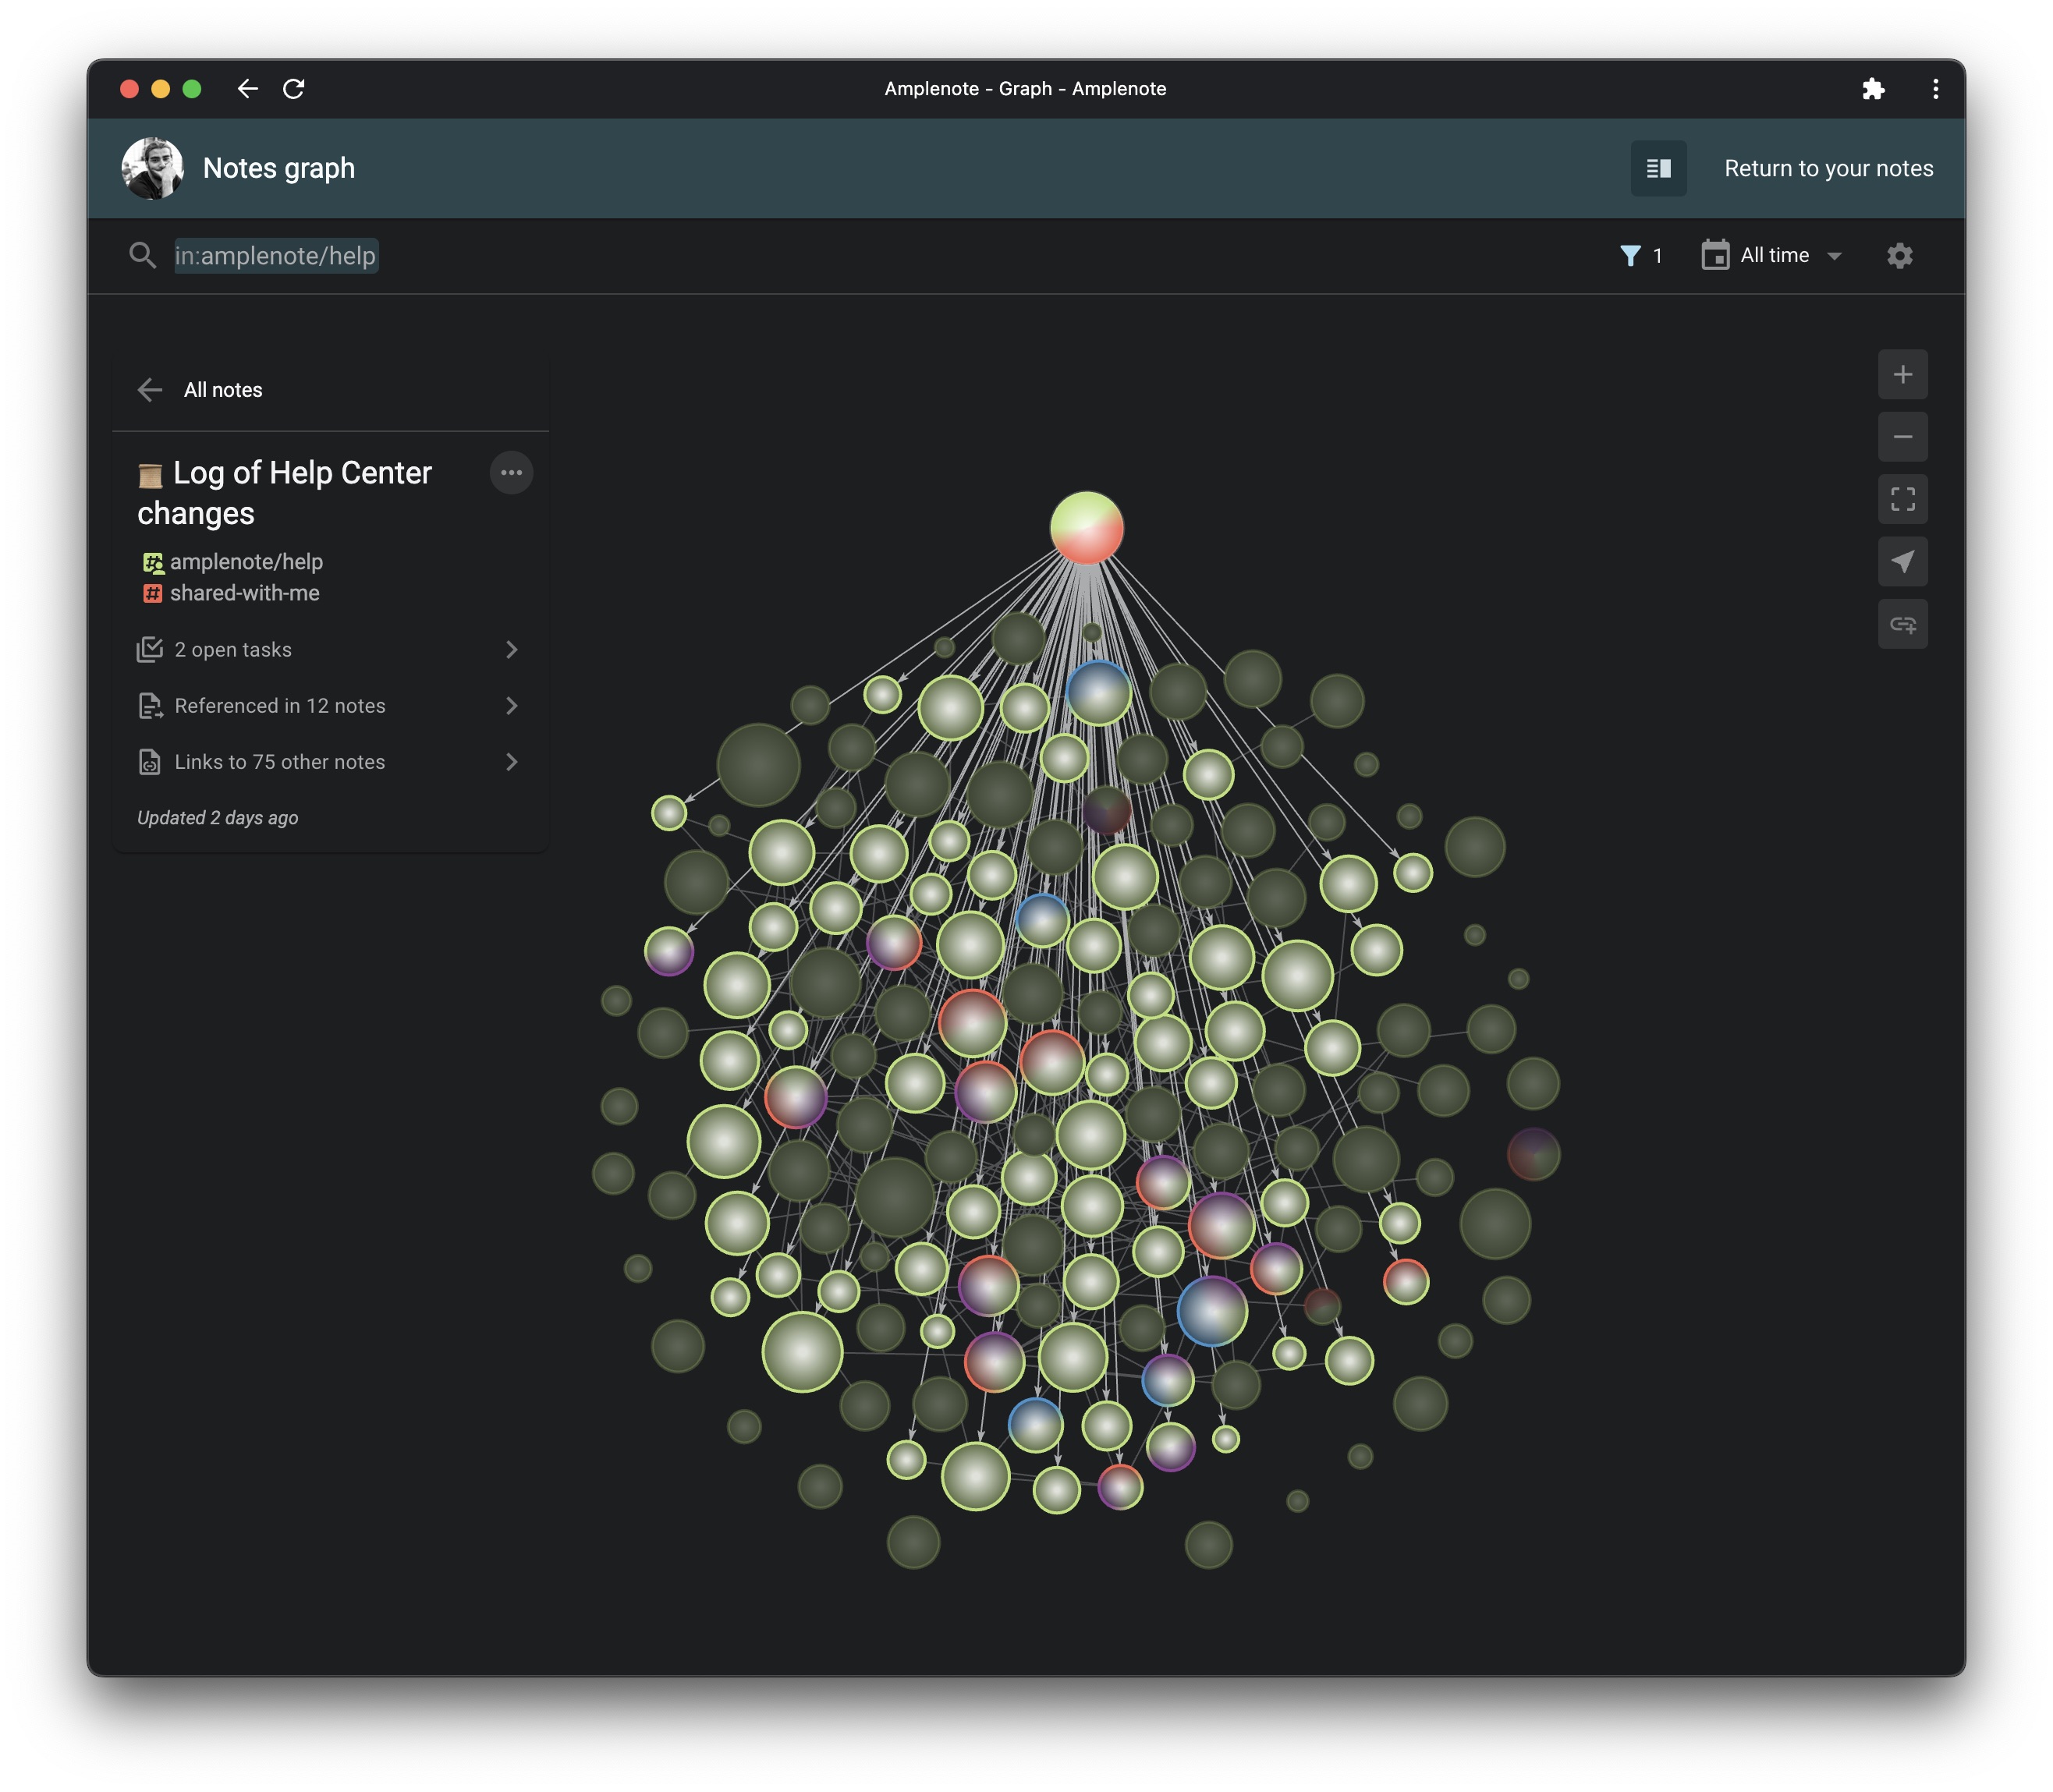
You'll also notice that some nodes are connected to other nodes via arrows. Those arrows represent the connections/links between notes that you created when editing those notes in the past. Arrows will always have the origin at the note that contains the link and will end at the note which is linked.
You can think of your Note Graph as a map of your notes and how they relate to each other. You can browse this representation of your notes to get insights that would otherwise be impossible without this visualization. For example, you might find a note that has an unusually large number of arrows pointing outwards. This likely means that you've created that note to serve as a "table of contents" for other related notes:
Graph View is also great at surfacing "isolated nodes", that is nodes not connected via arrows to anything else. These correspond to notes that (1) don't link to other notes and (2) are not mentioned in any other notes either. The Note Graph helps you find those outliers and act accordingly.
linkWhat if I don't have many links between my notes?
If this is you, you are not alone! In a world before Graph View, creating a link was a bit more abstract and there were no satisfying visuals to accompany that action. But fear not because starting now, the more often you will be checking your Note Graph, the more links you will want to create between your notes in the future.
That said, if you want to catch-up on your note connections, we have two suggestions for you:
Use the Unliked References tab of a note to look for potential connections you might have missed
Use the AutoLink Plugin to automatically apply links to a text selection.
linkNavigation
Let's go over how to navigate around the Note Graph. The main actions you can take to move around in your graph are all found in the buttons on the right side of the page:
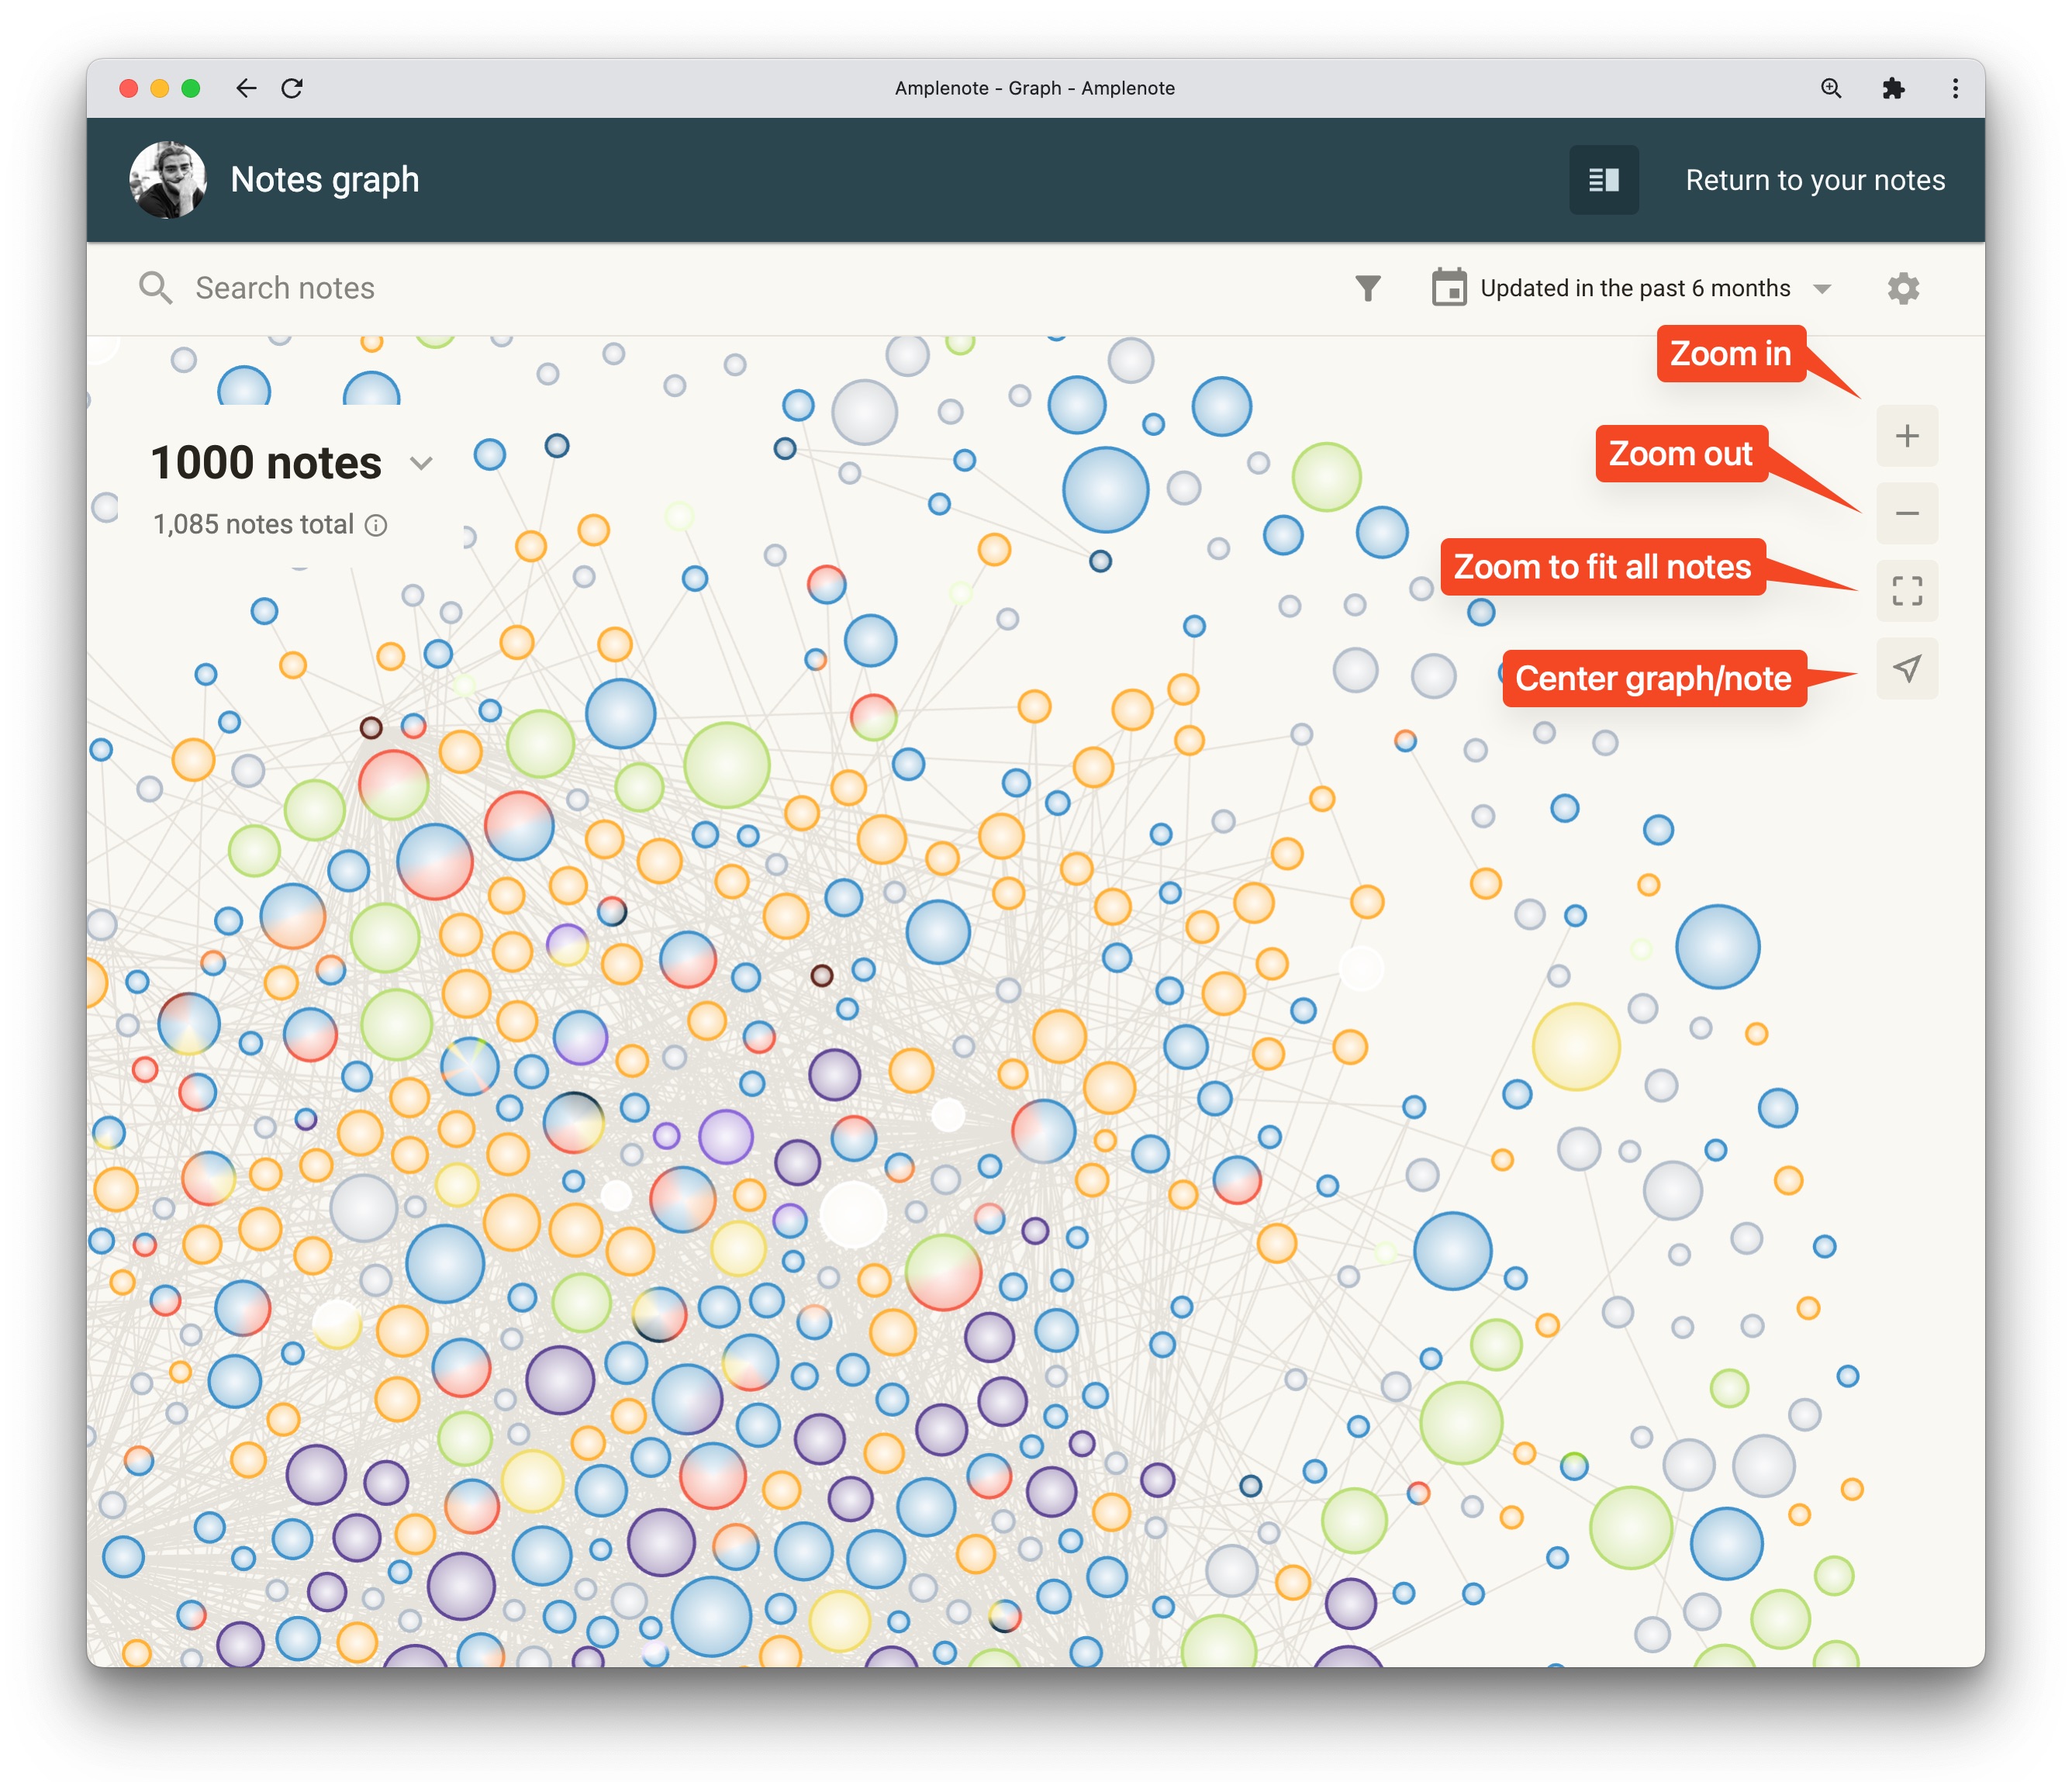
In addition to the navigation buttons, you can also use the mouse/touchpad to zoom in and out by scrolling up and down, as well as move in any direction by clicking and dragging.
When a note is selected, the button in the sidebar will center the view such that the selected node is centered, whereas if no notes are selected, pressing the same button will align the center of the view with the center of the graph itself.
linkKeyboard Shortcuts/Hotkeys
For your convenience, here is the complete list of hotkeys to serve your Note Graph navigation endeavors:
macOS | Windows/Linux | Effect |
|
| Center the view on the graph/currently selected notes |
|
| Zoom out to fit all visible nodes |
|
| Select multiple nodes |
|
| Open the corresponding note in the Peek Viewer |
|
| Enter note linking mode |
linkSearching and filtering the Note Graph
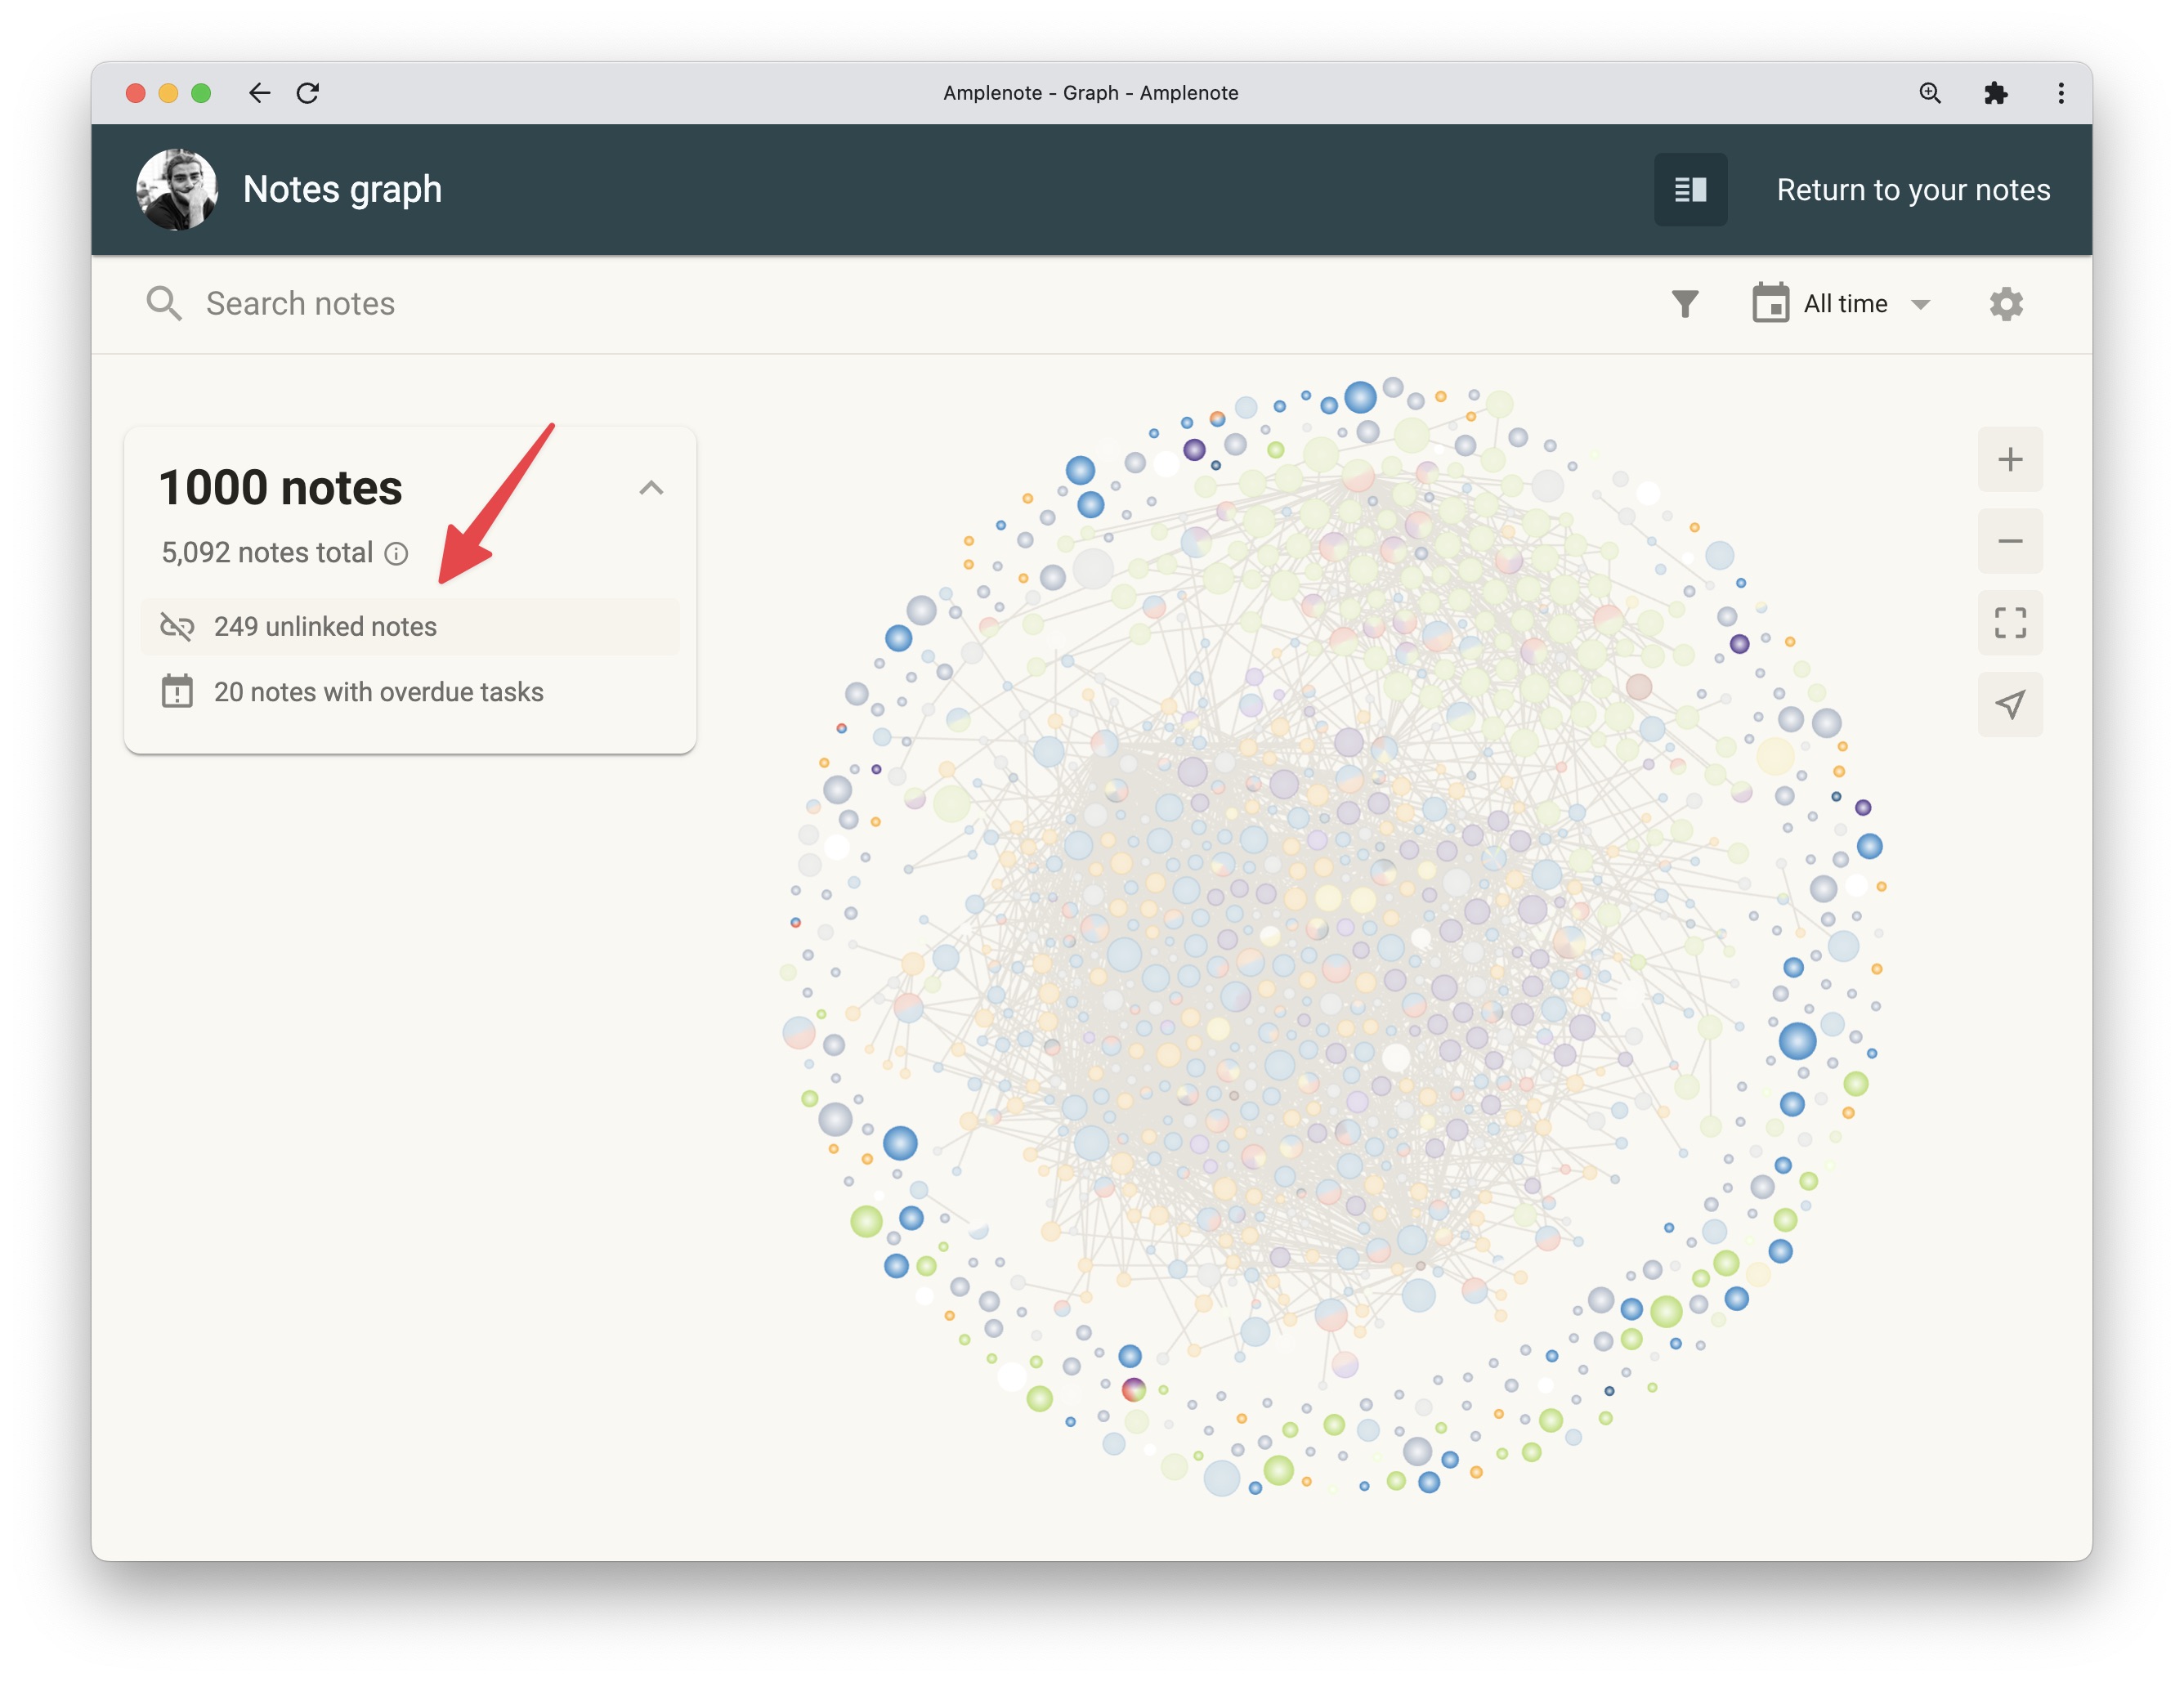
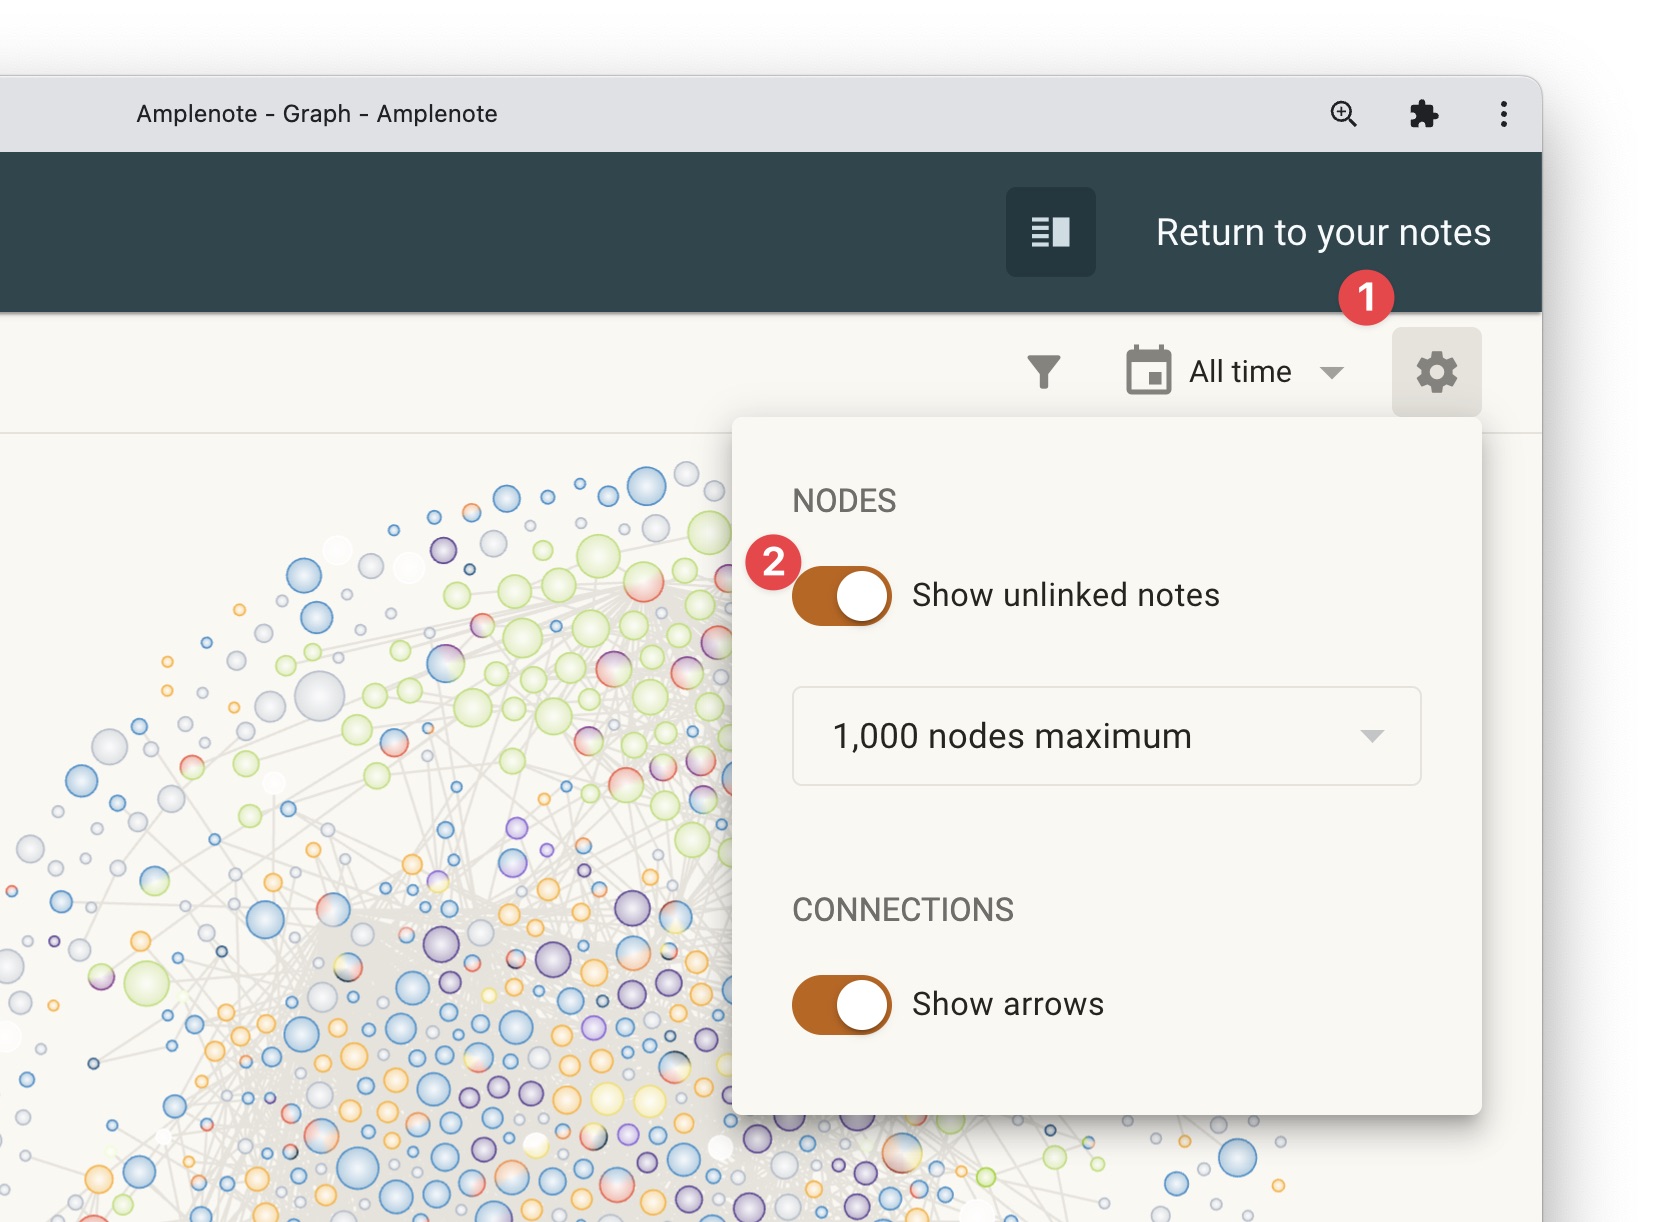
You'll notice that by default the graph will only load 1000 notes from your notebook. You can change this number using the settings menu in the top-right corner of the page.
Using the adjacent menu, another way to narrow down your note graph is by filtering to only those notes that were updated between a certain date range:
The rest of the filtering options might look familiar to you already, and they are:
The search bar (you can switch between full search and title search using the graph settings menu)
The group and tag filtering options
The date, tag and group filtering options are useful when you want to narrow down the list of notes on the graph. For example, you might choose to exclude your work-related notes by typing in in: ^work, which can offer a more relevant picture of how your notes are connected with each other.
linkJumping to Note Graph filters
From various points within the app, you can jump straight to a convenient graph-mode filter in the following ways:
linkNote selection and batch operations
linkManually selecting nodes
Hold Shift while clicking and dragging over your notes to select or deselect notes and apply batch operations to them. The same can be achieved if you use Shift-Click on individual nodes to fine-tune your selection.
linkSelecting notes under a certain tag
Also useful: clicking on the name of a tag will select all notes under that tag that are also visible in the current filter:
linkSelecting incoming/outgoing links
Whenever you select a note, you have two handy buttons that let you quickly select either:
All of the notes that link to the selected note
All of the notes that are linked to from the selected note
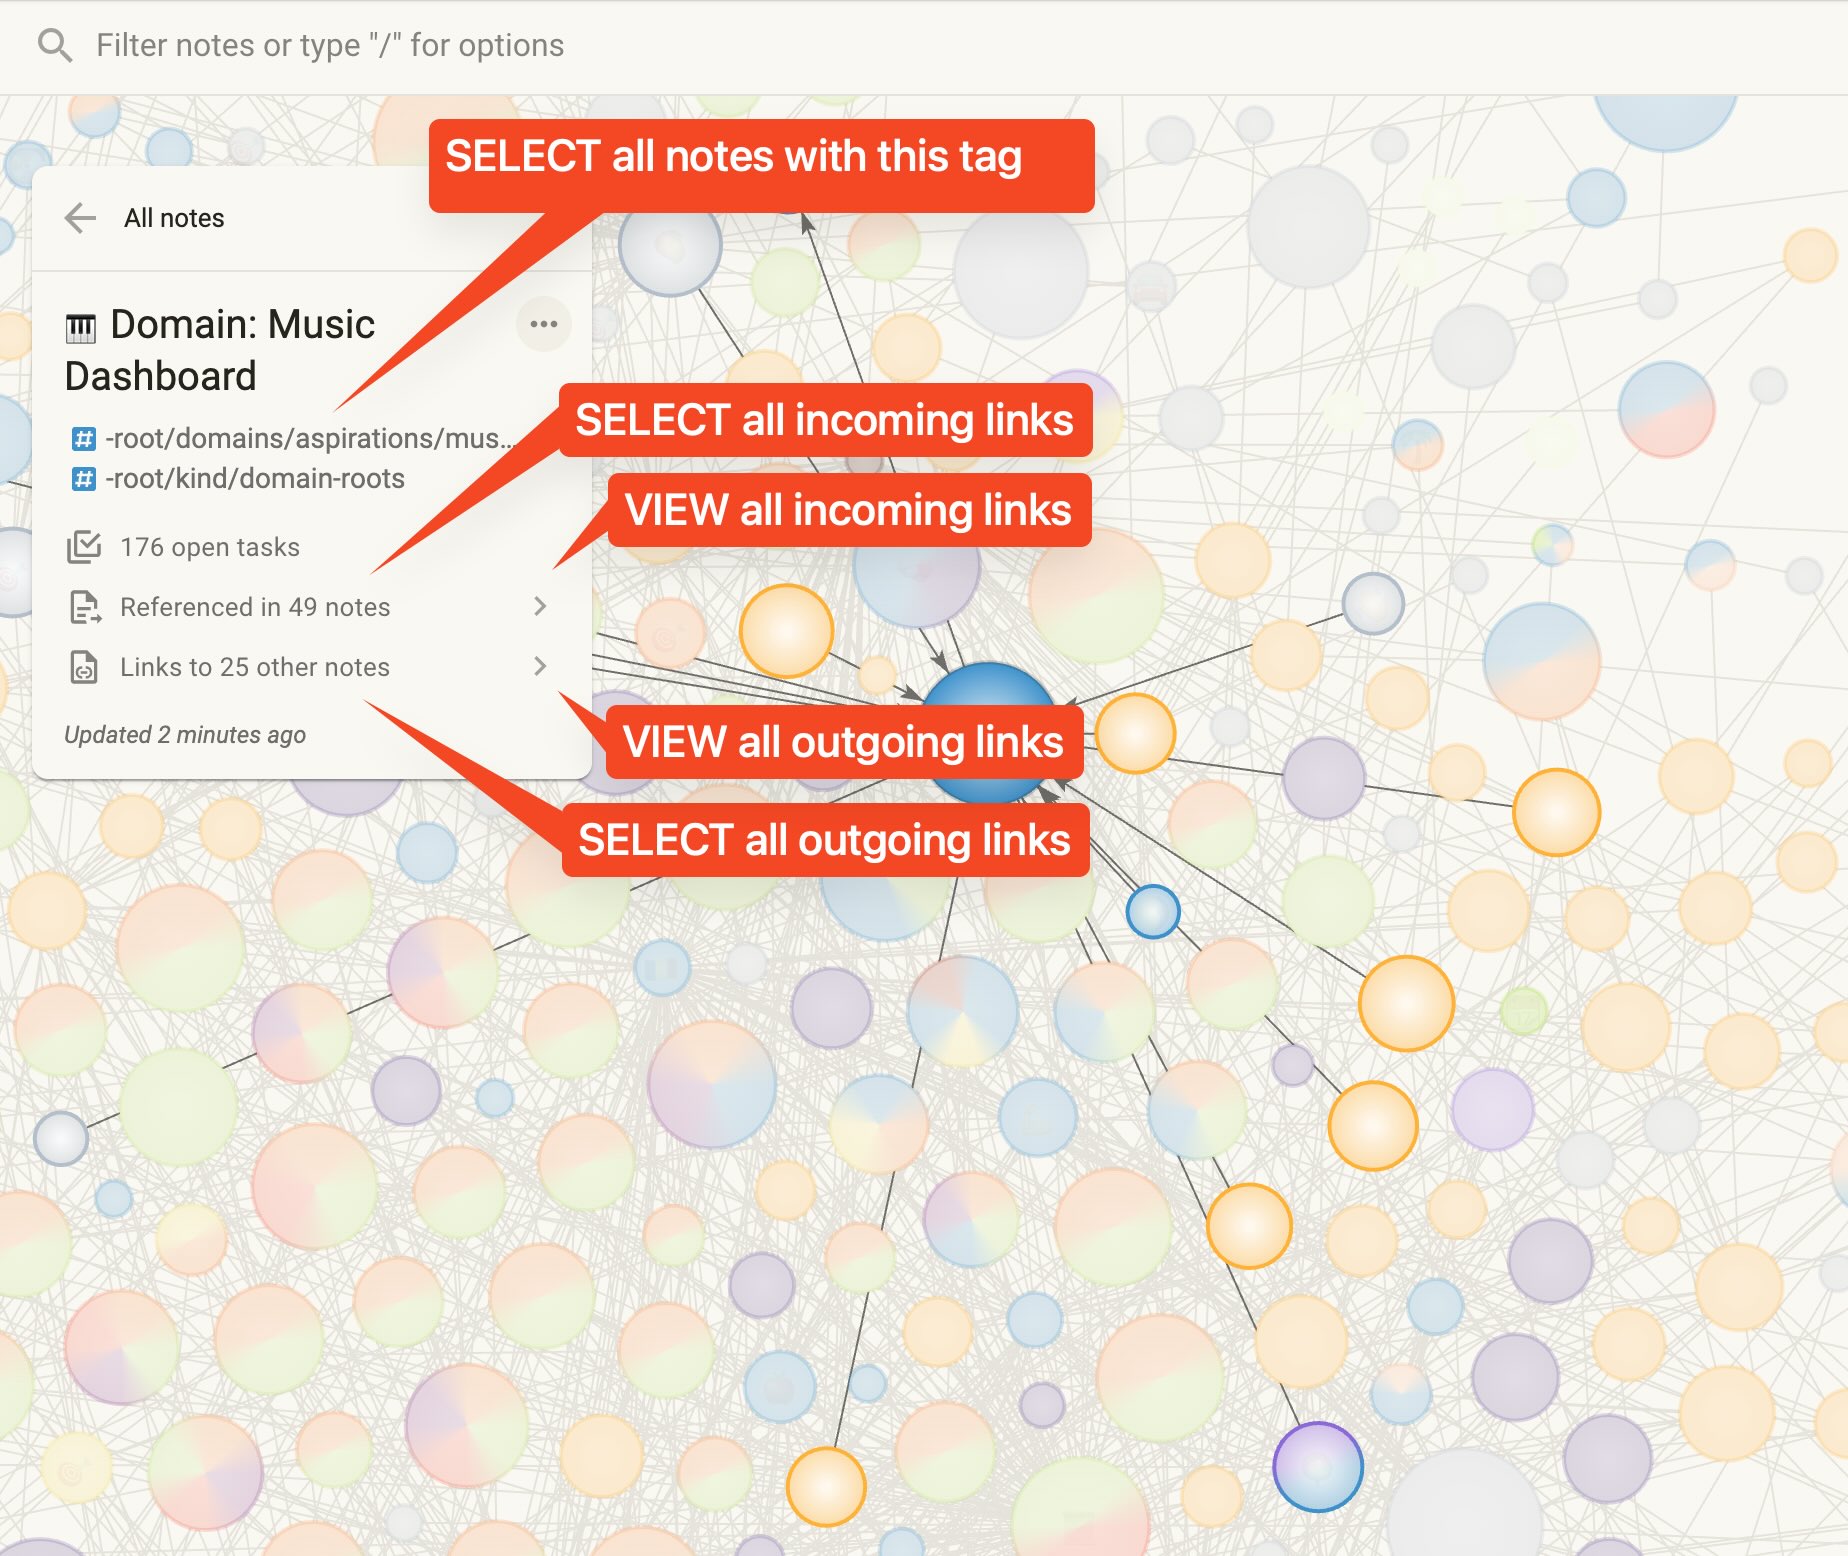
Quick selection options available when selecting a note on the graph. Can jump to selecting tags or incoming/outgoing links.
linkBatch note operations
When multiple notes are selected, you can apply/remove a tag, download, delete or archive those notes or create new connections. Outside of linking, which we will cover below, the note options are the standard ones that Amplenote supports and you can learn more about them here.
linkUse case example: Select and fine-tune notes to be deleted
The new Graph View may be the most powerful interface yet for filtering and acting on notes. In the example in the video below we are deleting old and unnecessary notes from the notebook by doing the following:
First, we search for notes that match the word "diagnostic"
Then, we select all of them by holding Shift, clicking and dragging over the notes
Then, we make sure to exclude notes that matched our search but arent' actually "diagnostic" notes
Then we use the multi-select toolbar to apply the deletion
linkUse case example: Apply a common tag to related notes
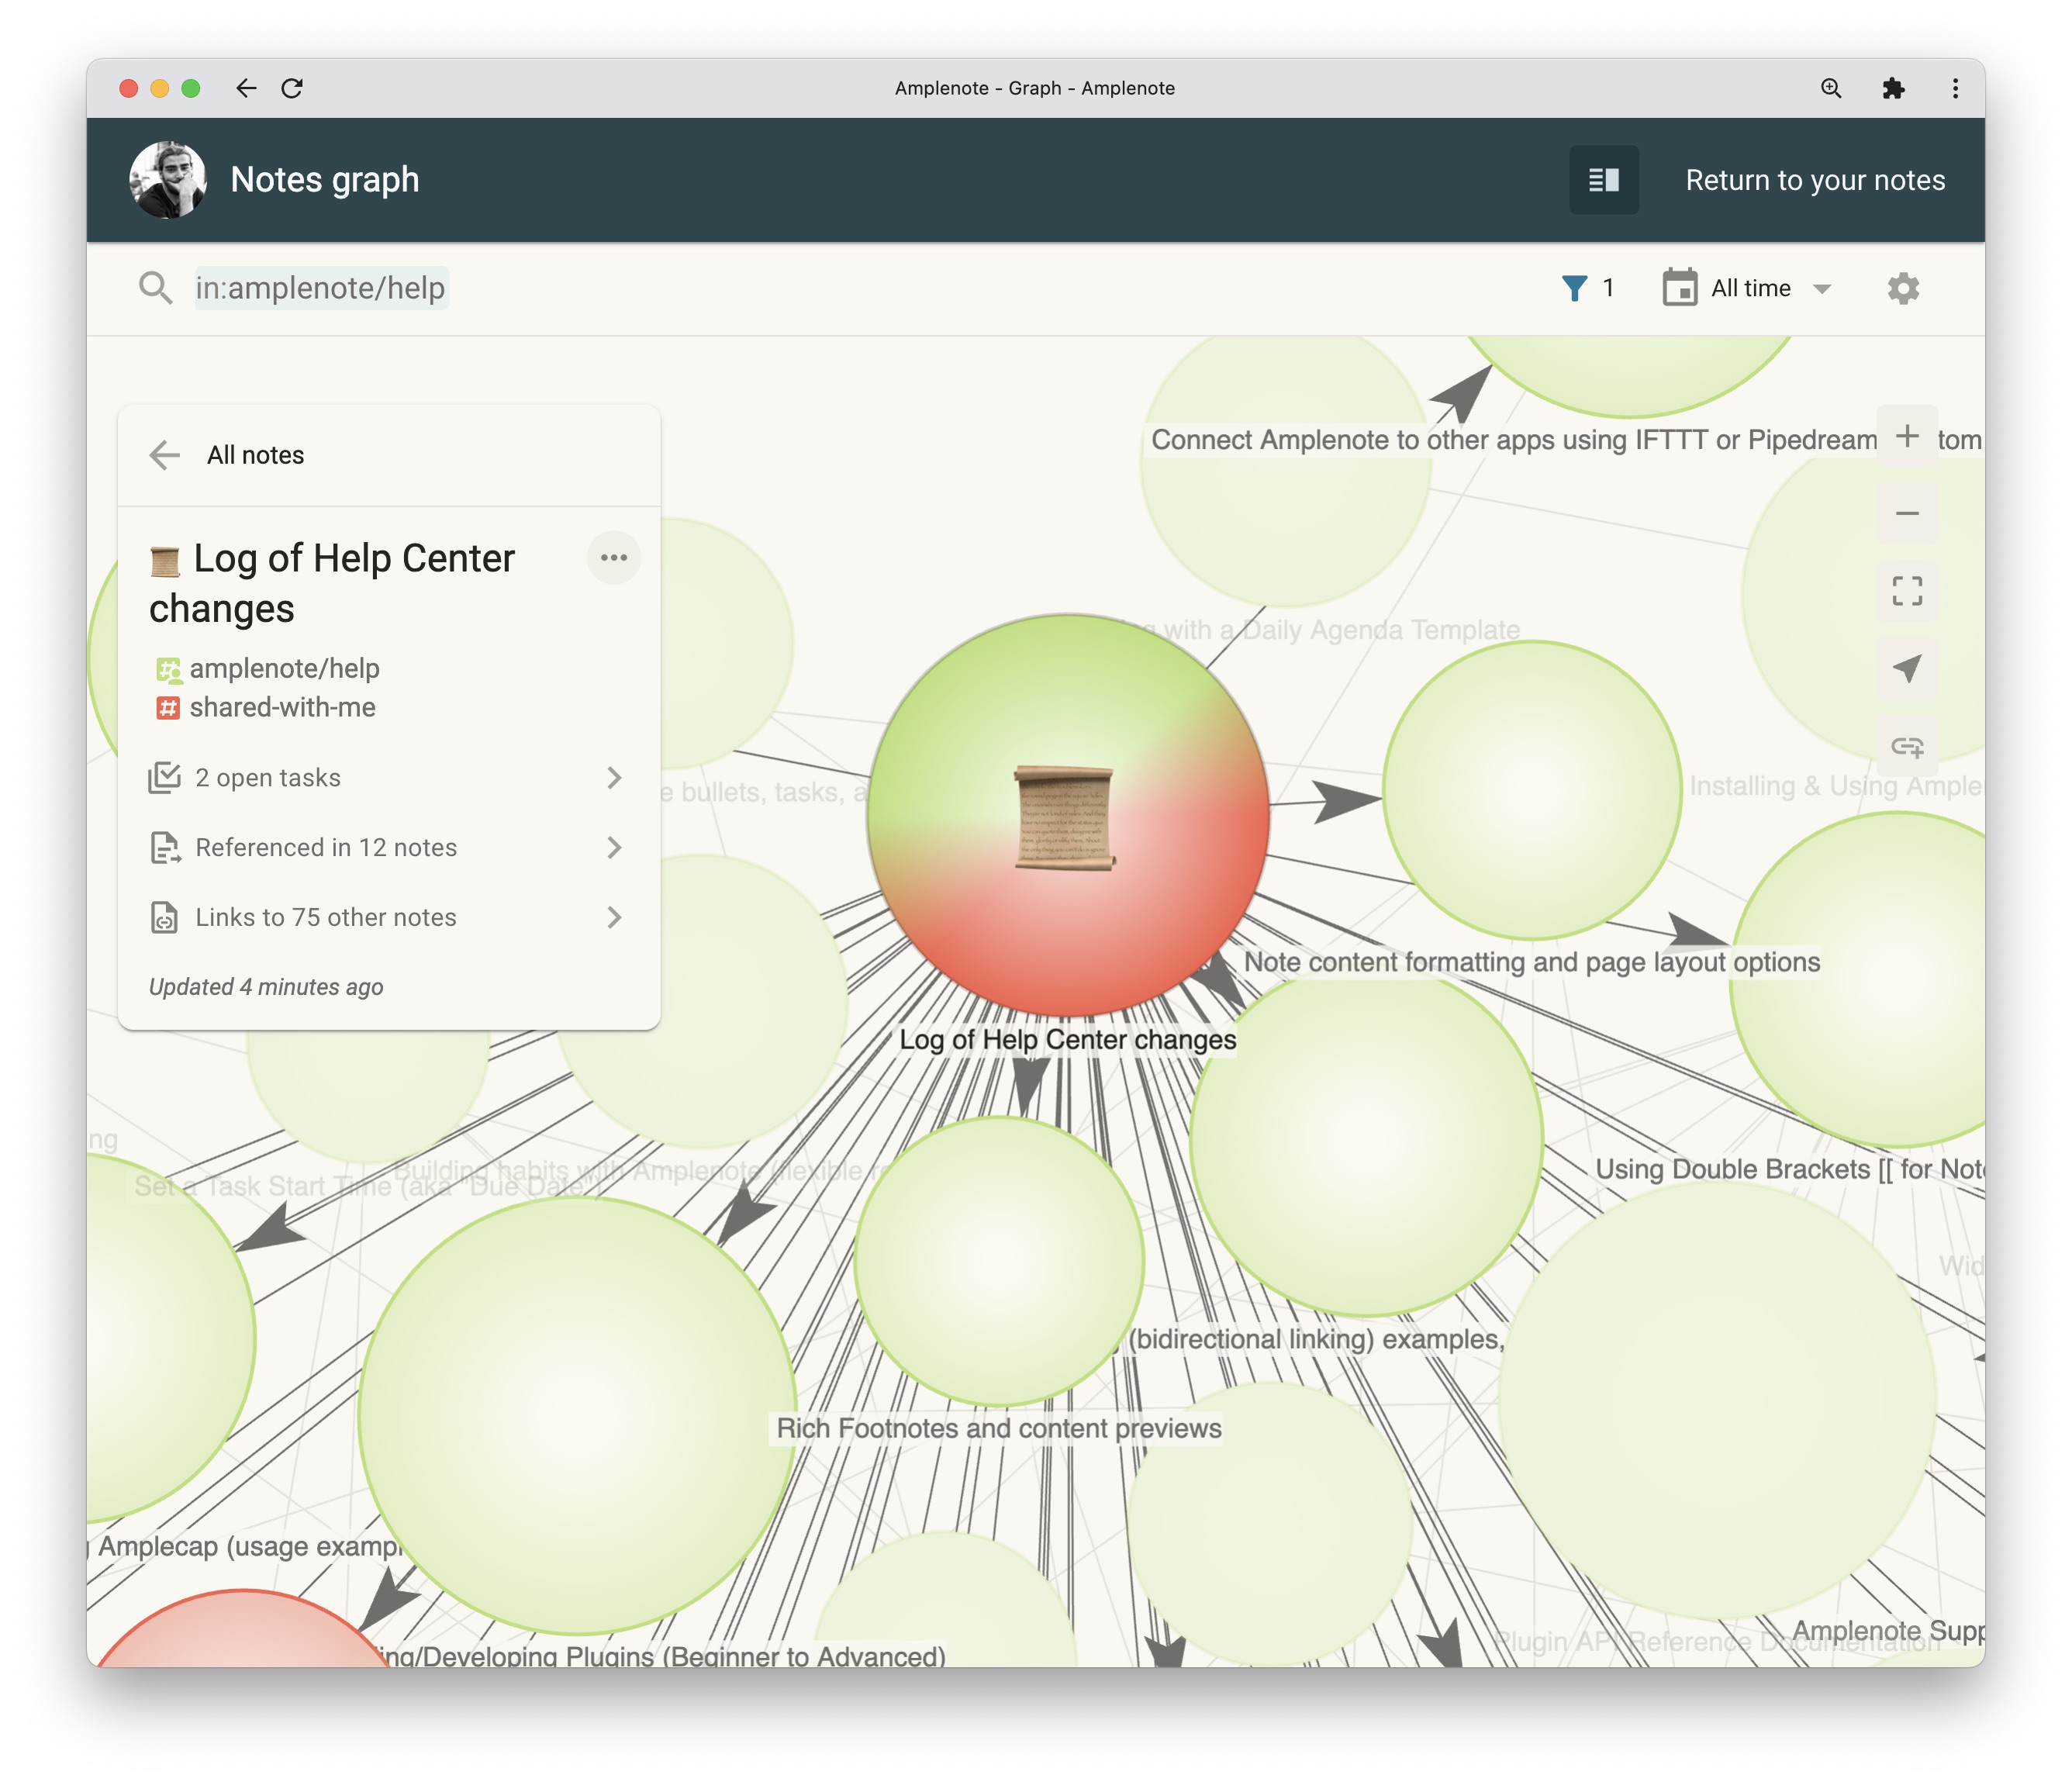
Let's take the example we mentioned above, the one where we notice a single note with a large number of outgoing links:
Most of the times, when we created a large number of links from a single note to many distinct notes, we were probably enumerating notes that have something in common. In the image above, the note called "Lof of Help Center changes" most likely references a bunch of individual Help Center notes.
In cases like this, we can quickly select all of the linked notes and perform a batch operation on them. For example, we can select all of the referenced notes (outgoing links) and add a common tag to them:
linkIntroducing Note Emojis 😎
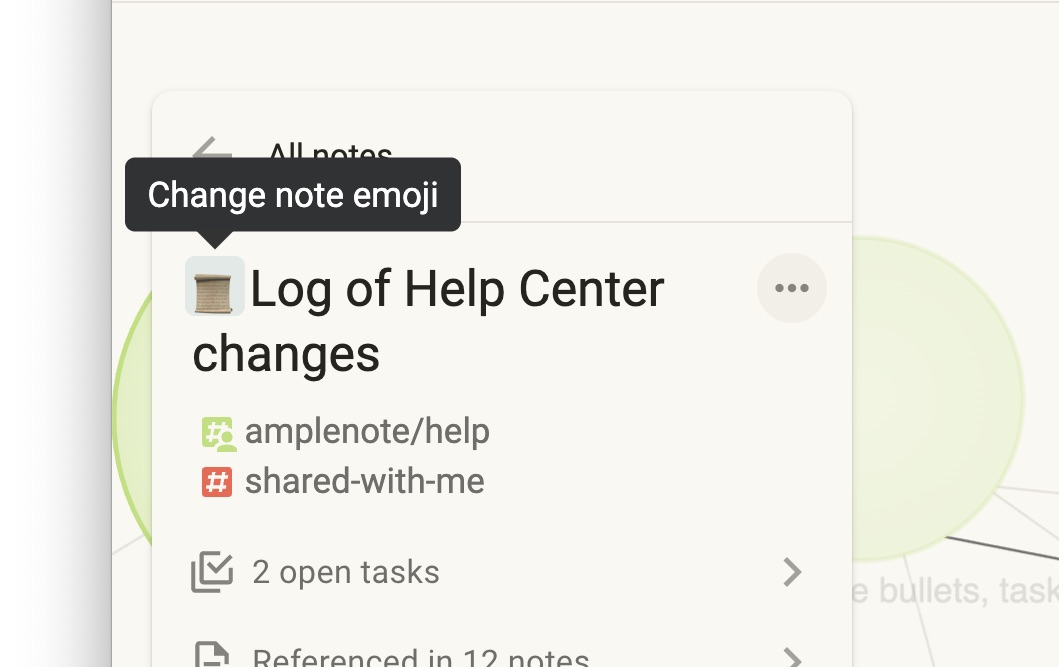
Starting with the release of Graph Mode, Amplenote will treat the first emoji character found at the start of a note's title as that note's dedicated emoji. It will appear in Graph Mode as the icon of that note, as so:
In the future, Amplenote will recognize Note Emojis in other places of the app as well.
To add/change a note emoji, select your note from Graph Mode and tap on the icon to the left of the note title:
As of December 2023, team Amplenote likes to use Note Emojis to visually distinguish notes from each other at a glance. For example, you might apply the briefcase 💼 emoji to work-related notes you need to visit/link to often. Or you might prefix all of your "weekly reviews" or "work reports" with a clipboard 📋 emoji. Hobby-related notes are also prime examples of notes that benefit from the visual identifiers in your notebook: 🎶, ⛷️, 🌻.
linkVisualize note links & connections
Note Graph is best used to explore connections between notes. In the main panel, you will see a collection of nodes and arrows between nodes. Nodes represent notes, and arrows represent how they link to each other. Arrows will always have the origin at the note that contains the link and will end at the note which is linked
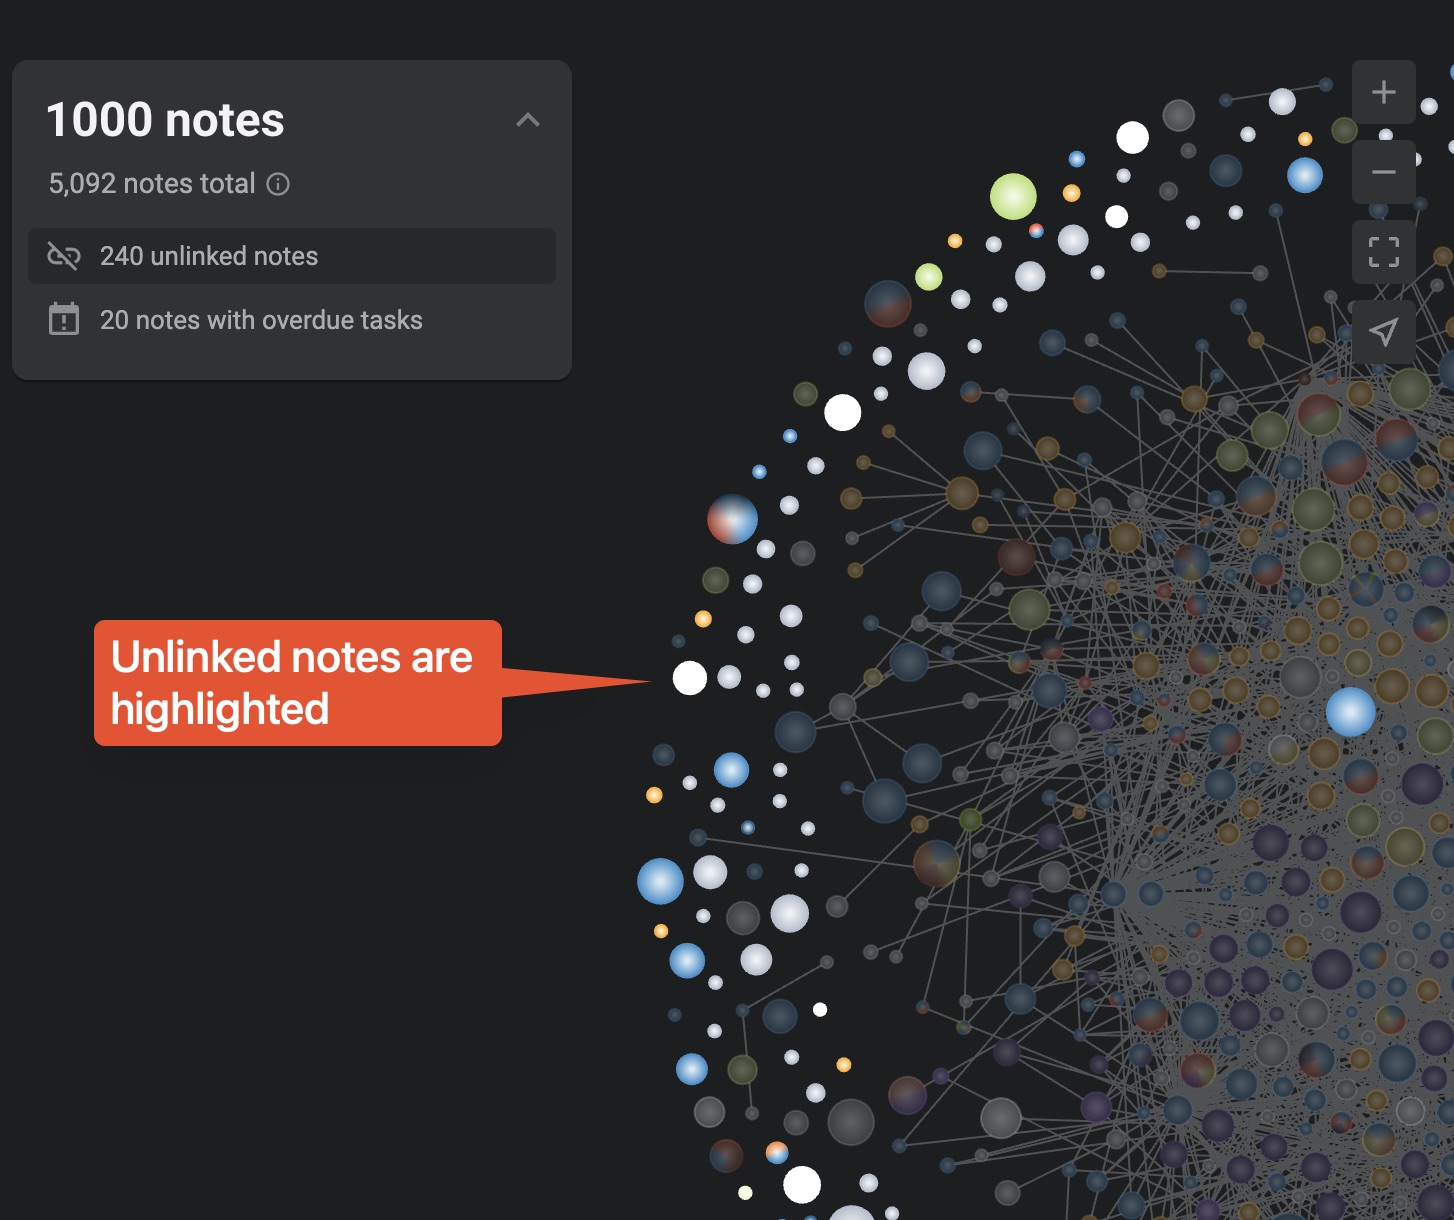
Nodes that are isolated represent notes that don't link to anything and are not linked to from anywhere. You can highlight these notes using the note count menu in the left side of the page:
You can choose whether to show or hide unliked notes from the settings menu in the top right:
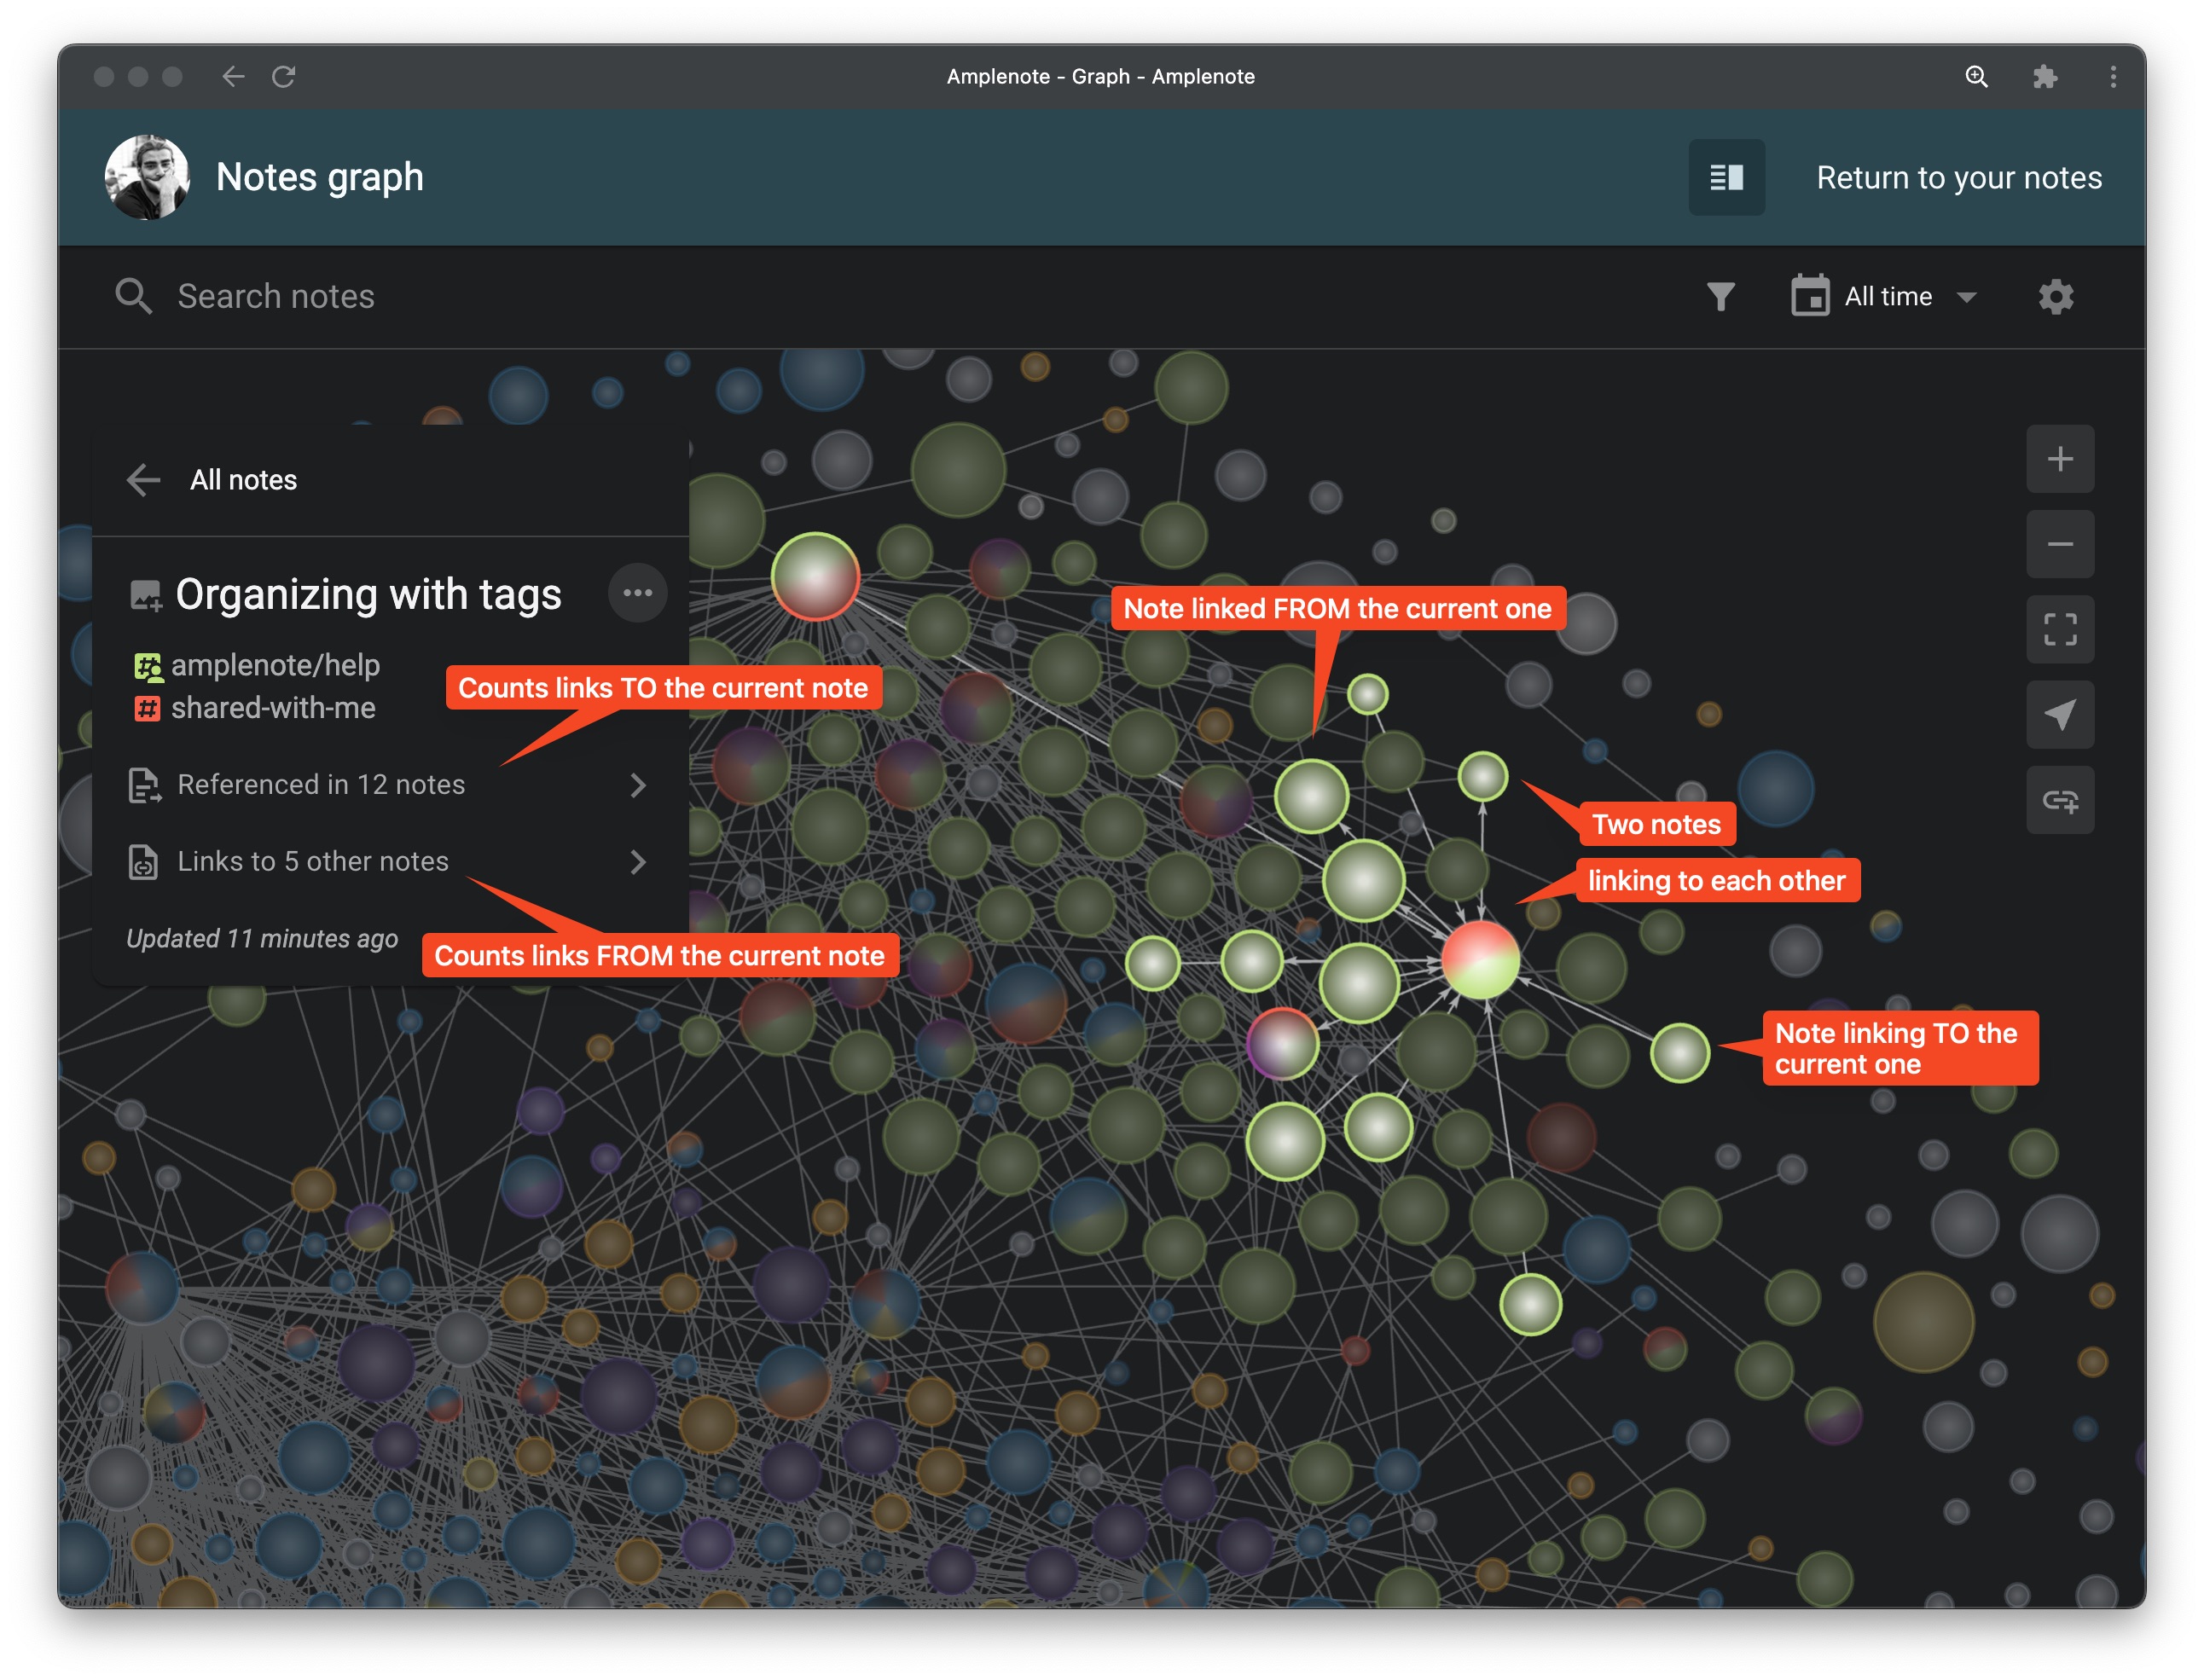
When you select an individual note, all connected notes will be highlighted and in the menu that appears you can see a list of all incoming and outcoming links respectively:
linkCreating new links & the Note Linking mode
There are two main ways to create new connections between notes in Graph View.
linkWhen two or more notes are selected
Use the note linking menu to select a target note. Pressing Enter will link the target note to all of the selected notes in one fell swoop. Note that none of the selected notes will be affected. Instead, the target note will now contain a list of links to all of the selected notes.
linkWhen a single note is selected
A more interactive way to create links is by selecting a single note and enterint Note Linking mode by pressing m on your keyboard or the button in the nav column on the right. When in Note Linking mode, clicking on a node will no longer select it, but it will add its link to the initially selected note. A subsequent click on the same node will remove that connection:
linkInteraction with Peek Viewer
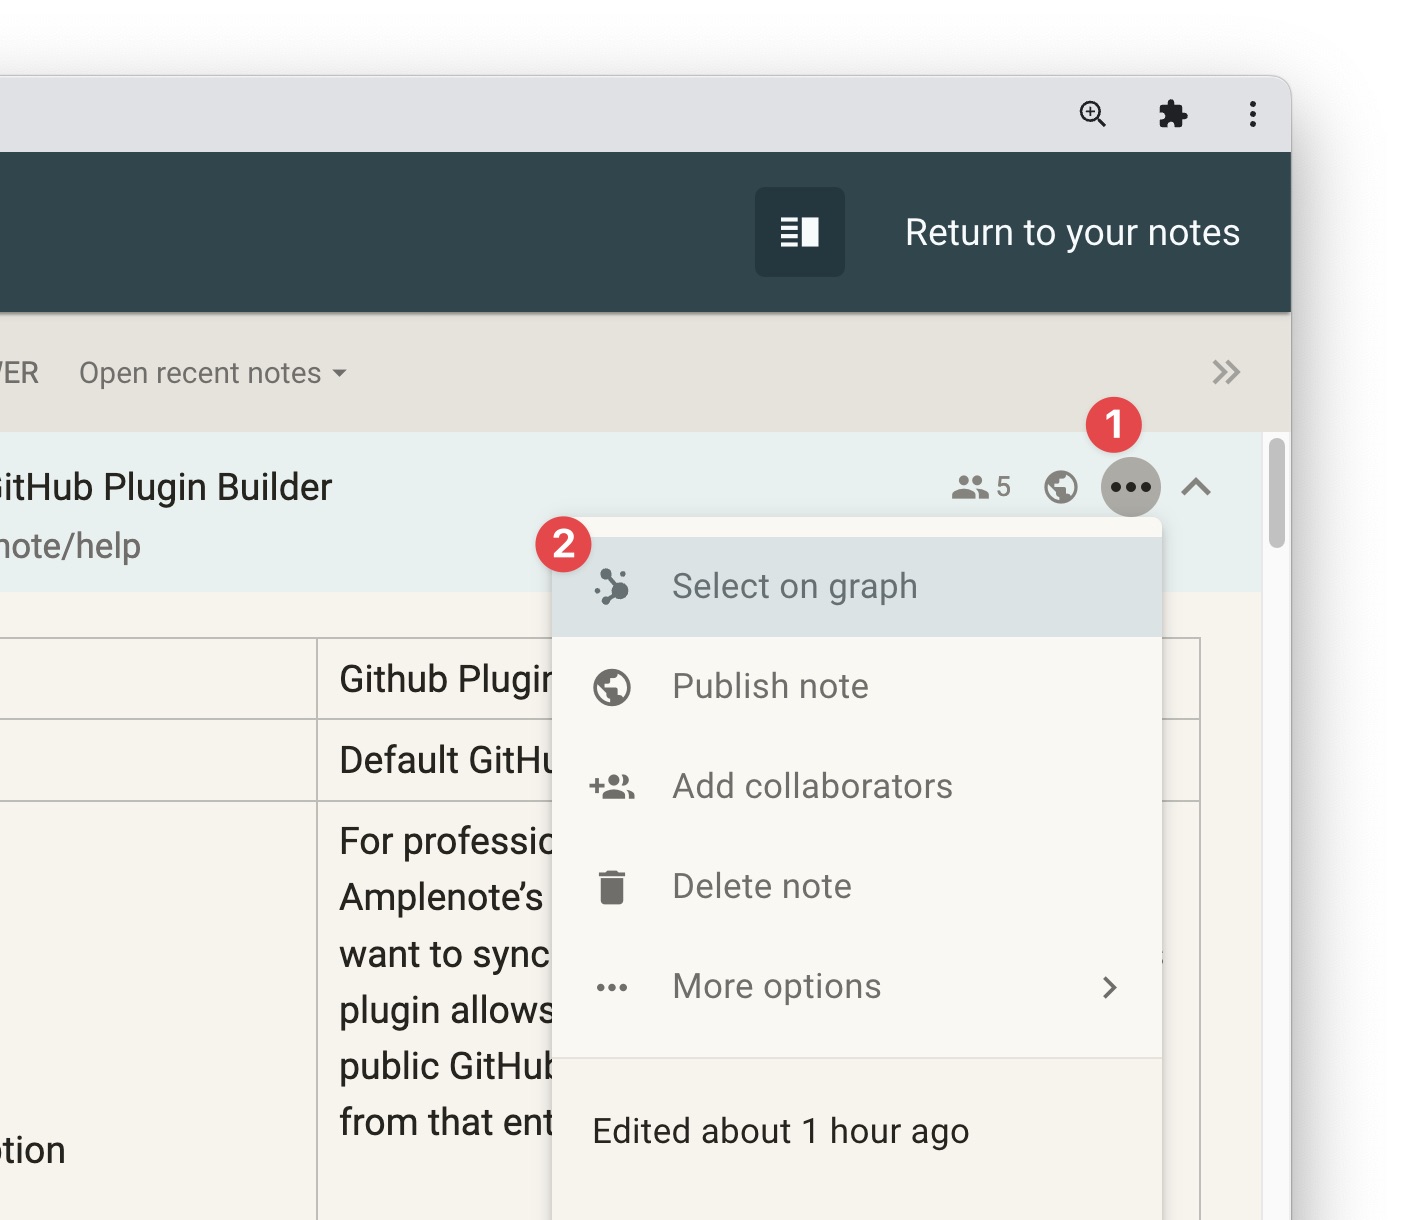
To quickly preview the contents of a note on you graph, simply Ctrl-Click or Cmd-Click on that note to open it in the Peek Viewer. From Peek Viewer, open the options menu of a note to quickly jump to that note on the Graph:
linkPeek Viewer & Graph View: A power couple for capturing insight 👯
It probably goes without saying, but when you are browsing your Graph View, we recommend always keeping a note open in your Peek Viewer, to capture the ideas that you generate as you navigate your notes. It is often an insightful experience to organize, connect, and reflect upon your accumulated wisdom. Having a blank slate to scribble on is almost always handy if you'll be spending minutes in the view mode.
linkTroubleshooting
linkI cannot interact with nodes in Graph Mode using Brave browser
There is a known issue with using Graph Mode in Brave. If you cannot select notes on your Graph, make sure to turn off "Shields" for amplenote.com:
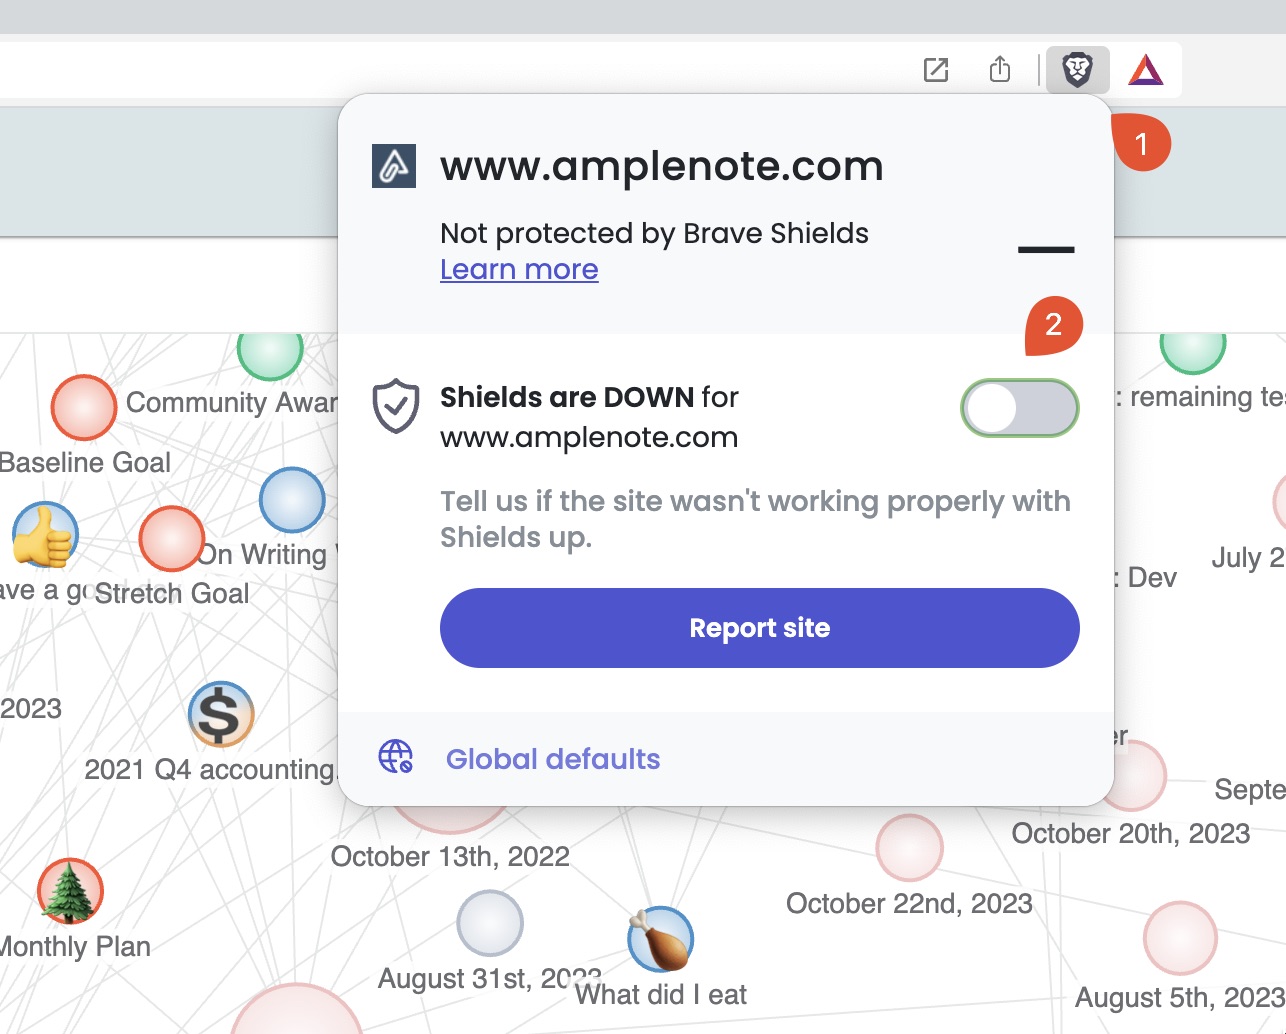
The above can be done while visiting amplenote.com/notes from the regular Brave browser (not the PWA).
linkOn the horizon
In 2024, we plan to continue extending Graph Mode. The two biggest opportunities we plan to explore are 1) bringing a version of Graph View to native mobile app 2) allow miniature version of note graph to be shown in the Peek Viewer. Please be sure to vote for these features on our Roadmap Voting Boards if you would like to see them happen more sooner than later?